Macro Photography Lenses: From Close-Up Filters to True 1:1
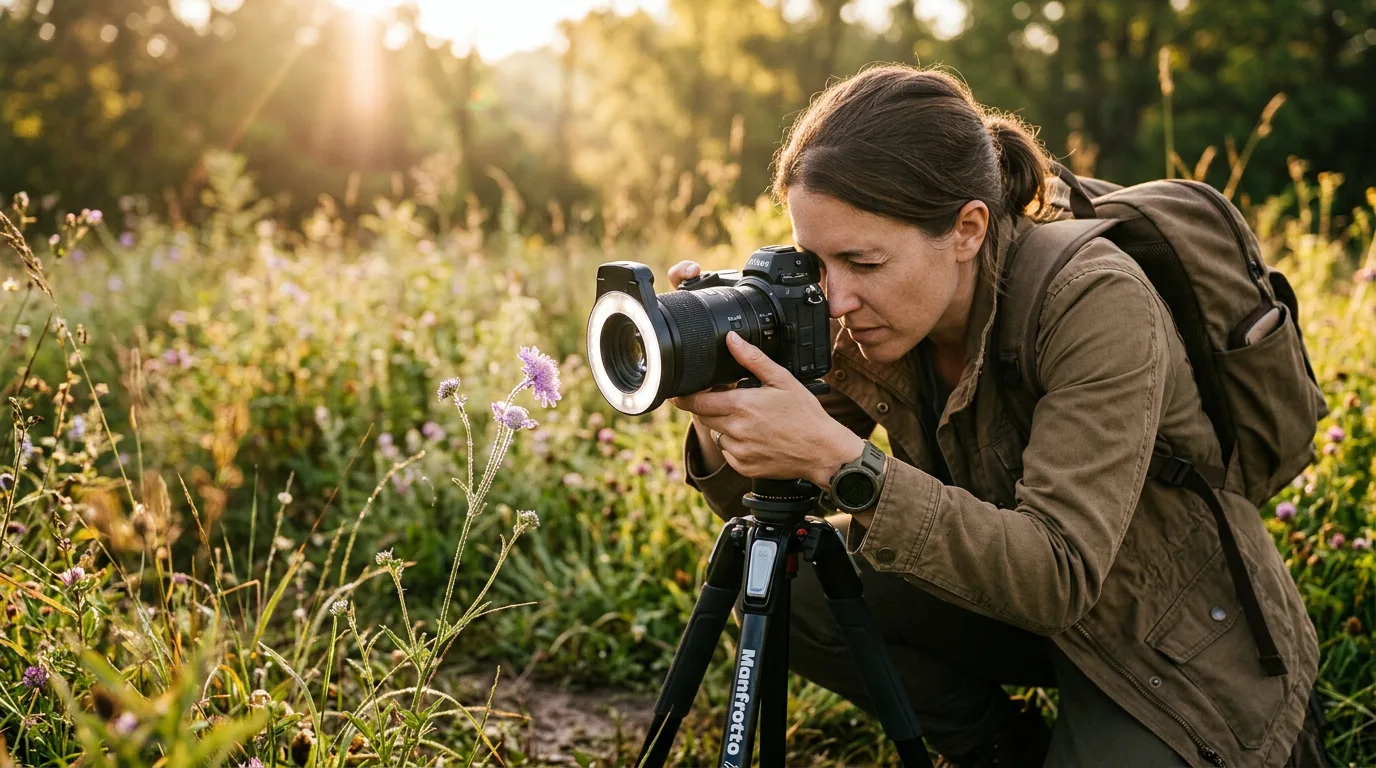
Every lens manufacturer slaps "macro" on products that top out at 0.25x magnification — a quarter life-size on sensor. That is close-up photography, not macro. True macro begins at 1:1 reproduction, where a grain of rice fills the same physical space on your sensor as it occupies in reality. The difference between 0.25x and 1.0x is not a marketing nuance. It determines the difference between a flower in a field and the individual pollen grains on a stamen.
We researched dedicated macro lenses from 60mm to 180mm, evaluated extension tubes and close-up filters as budget alternatives, and analyzed hundreds of Amazon reviews from photographers shooting insects, flowers, jewelry, and product catalogs. This guide covers the optical physics that make macro difficult — paper-thin depth of field, diffraction limits, and the lighting challenges of working centimeters from your subject — and the practical techniques that solve each problem.

1:1, 0.5x, 0.25x — What Magnification Numbers Actually Mean
Magnification ratio describes how large a subject appears on the camera sensor relative to its real-world size. At 1:1, a 10mm insect projects as a 10mm image on the sensor. At 0.5x (1:2), that same insect projects at 5mm. At 0.25x (1:4), just 2.5mm. On a full-frame sensor measuring 36mm wide, a 1:1 lens can fill the entire frame with a subject roughly 36mm across — slightly larger than a U.S. quarter.
Most zoom lenses advertised as "macro" reach 0.25x to 0.33x. This is enough to photograph a watch face or a small flower filling most of the frame, and many photographers never need more. But 0.25x cannot reveal the compound eye of a dragonfly, the texture of a snowflake, or the facets of a cut gemstone. Those subjects demand 1:1 or higher.
Lenses that exceed 1:1 exist but are specialized. The Canon MP-E 65mm reaches 5:1 — five times life-size — but lacks autofocus, has zero infinity focus capability, and requires studio-level lighting and a focus rail. The Laowa 25mm f/2.8 Ultra Macro reaches 5:1 as well, in a more compact package. At these magnifications, you are photographing structures invisible to the naked eye. Depth of field at 5:1 is measured in microns.
Focal Length and Working Distance: The Practical Divide
All true macro lenses reach 1:1 magnification. The difference between a 60mm, 100mm, and 180mm macro is not magnification — it is how far the front element sits from the subject at maximum reproduction.
A 60mm macro at 1:1 places the front element roughly 9 centimeters from the subject. That is close enough that the lens barrel casts a shadow, leaving almost no room for external lighting. Insects flee before you get this close. Product photographers can manage it because still-life subjects do not run, but even they contend with lens shadow in their setups.
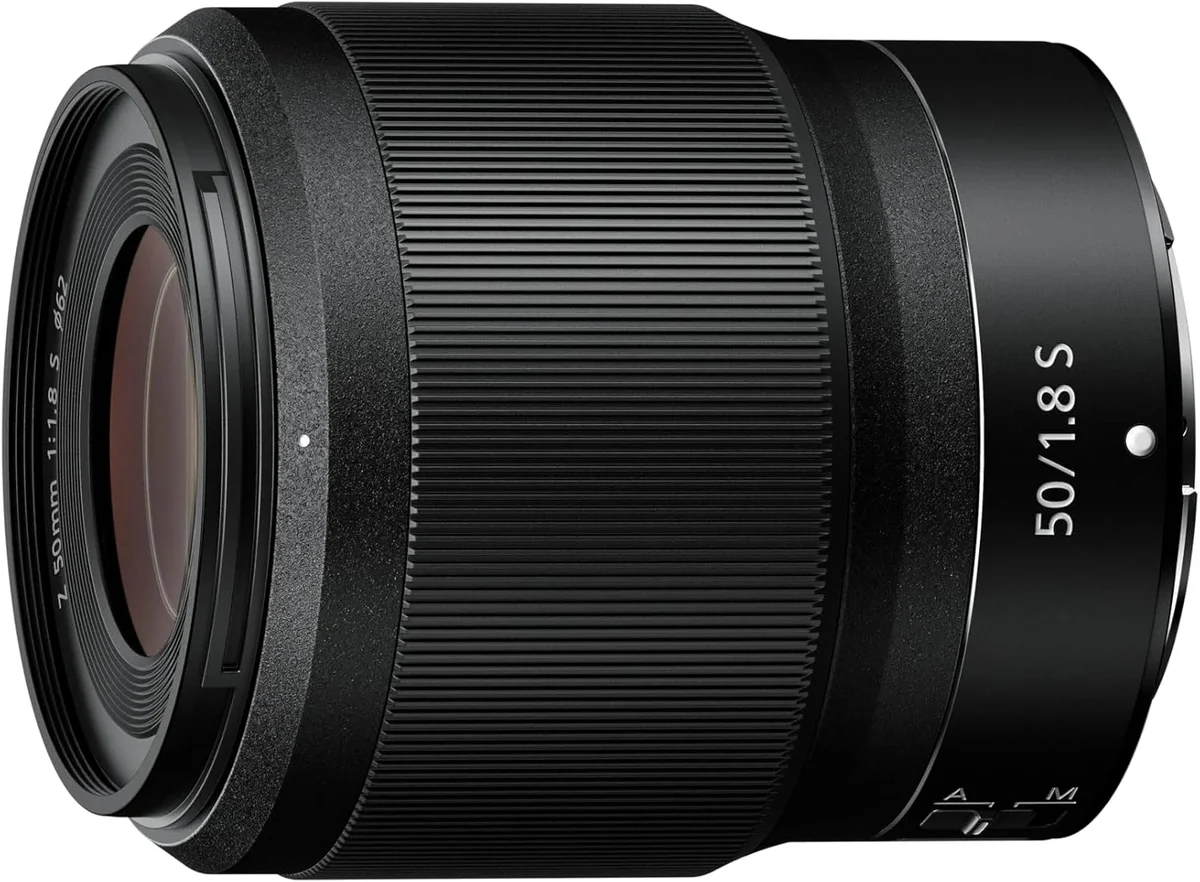
At 100mm, working distance opens to approximately 15 centimeters. This is the sweet spot for most macro work. Enough clearance for a small ring flash or a handheld reflector. Close enough that field conditions do not require a tripod head with extreme reach. The 100mm macro is the bestselling focal length in the category across Canon, Nikon, Sony, and Sigma, and working distance is the primary reason. Nikon Z shooters get a strong native option in the Nikkor Z MC 105mm f/2.8 VR S, which pairs 1:1 reproduction with 4.5 stops of optical VR. Sony E-mount users can browse our best Sony E-mount macro lenses roundup for dedicated options.
A 180mm macro pushes working distance to 25 centimeters or more. Insect and butterfly photographers favor this range because skittish subjects tolerate you at that distance. Wildlife macro — frogs, lizards, spiders in webs — benefits from the extra standoff. The penalty is weight: a 180mm macro typically weighs 700-900 grams compared to 500-600 grams for a 100mm. Autofocus is also slower because the internal elements travel farther.
Short answer: 60mm for desktop product photography and dental imaging. 100mm for general macro work. 180mm for insects and outdoor subjects that do not tolerate close approach.
Depth of Field at Macro Distances: Why Sharpness Becomes Razor-Thin
Depth of field decreases as magnification increases. At portrait distances, an f/2.8 lens might hold 5-10 centimeters in focus. At 1:1 macro, that same f/2.8 yields a depth of field under 1 millimeter. Not 1 centimeter. One millimeter. The antenna of a beetle is sharp while its eyes are soft.
This is physics, not a flaw. The formula for depth of field includes magnification as a squared term in the denominator — double the magnification and depth of field drops by a factor of four. No lens design, no matter how expensive, changes this relationship.
Stopping down helps, but with limits. At f/8, depth of field at 1:1 expands to roughly 2-3mm. At f/11, about 4mm. Beyond f/11, diffraction begins to soften the image at the pixel level. On a 24-megapixel full-frame sensor, diffraction becomes visible around f/13-f/16. On higher-resolution sensors (45-60MP), it shows up as early as f/11. You are balancing two competing forces: wider apertures give you sharper pixels but less depth, while narrower apertures give more depth but softer pixels.
The practical ceiling for most macro lenses on full-frame bodies is f/11 to f/16. Beyond f/16, diffraction softening outweighs the depth of field gain. On APS-C, pull that back to f/8 to f/11. On Micro Four Thirds, f/5.6 to f/8. Each format has a diffraction-limited aperture beyond which you lose more than you gain.
Focus Stacking: The Standard Solution for Front-to-Back Sharpness
When a single frame cannot hold the entire subject in focus, focus stacking merges multiple frames taken at incremental focus distances. A typical stack for a 1:1 macro of a small flower might consist of 30 to 80 frames, each shifting the focus plane by a fraction of a millimeter.
The process requires a stable platform. A tripod is minimum. A focus rail — a geared sled that moves the entire camera forward and backward in precise increments — is the standard tool. Manual rails use a knob to advance in 0.1mm steps. Motorized rails automate the sweep, advancing a set distance between each shutter actuation.
Several cameras now include built-in focus bracketing. Canon, Nikon, Olympus/OM System, and Panasonic bodies can automatically shoot a sequence of frames at defined focus steps, eliminating the need for a motorized rail. The camera shifts its internal focus between shots. You still need a tripod and a still subject, but the camera handles the incremental adjustment.
Stacking software merges the sharp regions from each frame. Helicon Focus and Zerene Stacker are the two dominant options. Photoshop can stack but produces more artifacts on complex edges — fine hairs and translucent wings cause problems. Dedicated stacking software handles these structures better because their algorithms are optimized for macro edge cases.
Wind is the enemy of focus stacking outdoors. Even a slight breeze shifts flowers and grass between frames, producing misalignment artifacts that software cannot fix cleanly. Early morning before wind picks up, or sheltered indoor environments, give the best results. Some field macro photographers carry a clear acrylic wind shield to block air movement around the subject.
Extension Tubes: Macro on a Budget
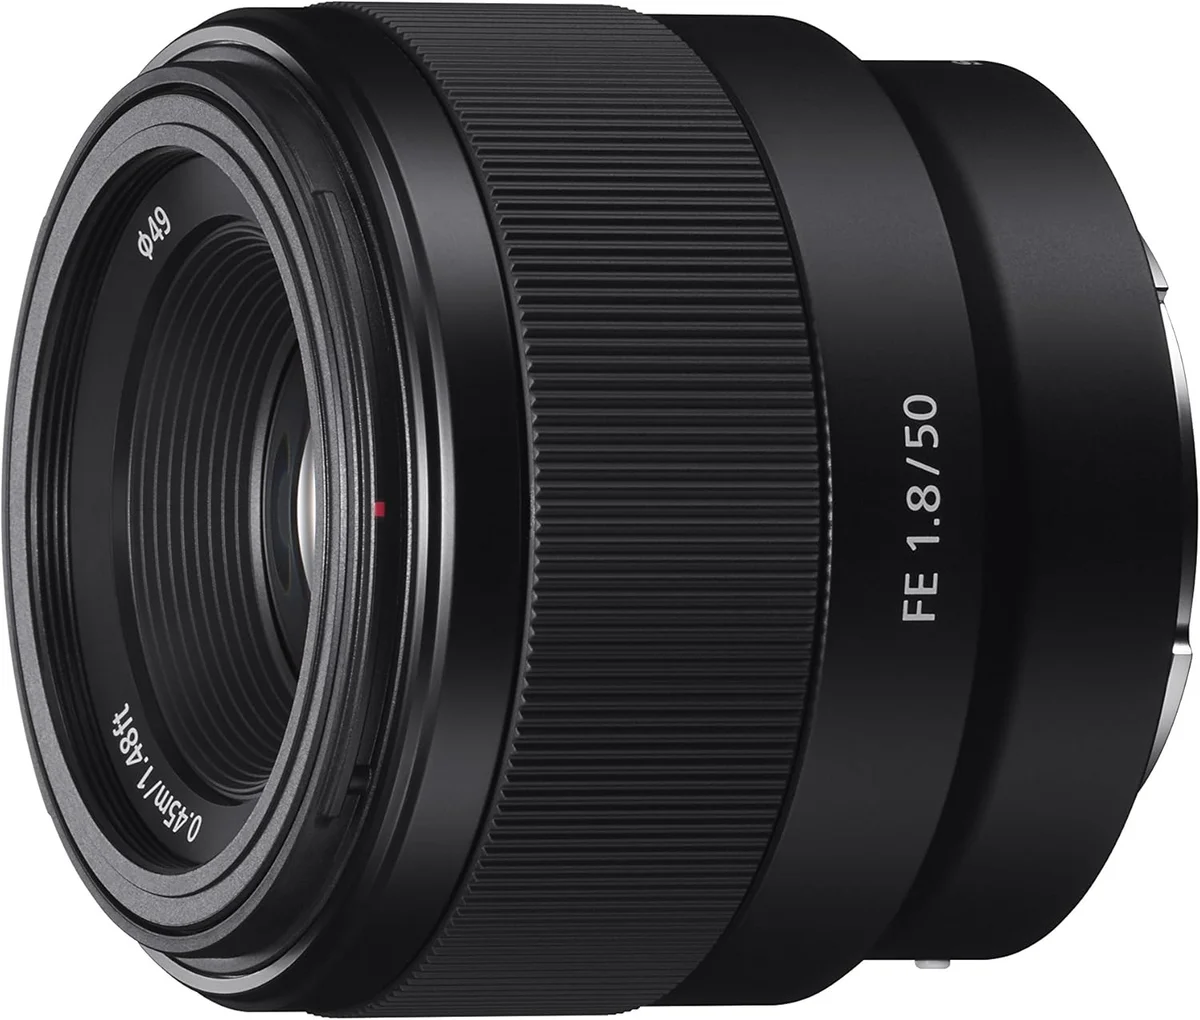
Extension tubes are hollow spacers that mount between the camera body and lens. They move the lens farther from the sensor, reducing minimum focus distance and increasing magnification. A 25mm extension tube on a 50mm f/1.8 prime turns it into a roughly 0.5x macro lens. Stack a 12mm and a 25mm tube together on the same 50mm and you approach 0.75x. No additional glass is involved — the lens optics are unchanged.
Because tubes contain no optical elements, they cannot degrade sharpness, contrast, or color rendition. The image quality depends entirely on the attached lens. A sharp prime like a 50mm f/1.8 performs well on tubes. A cheap kit zoom with soft corners will show those same soft corners at macro distances, amplified by the higher magnification.
The costs of extension tubes are practical, not optical.
You lose light — roughly 1 stop per 25mm of extension at typical focal lengths. Autofocus slows and may stop working entirely at higher magnifications. And you lose infinity focus: with tubes mounted, the lens can only focus at close range. This makes tubes a poor choice for situations where you need to alternate between macro and normal shooting quickly. Removing and remounting tubes in the field takes time, and dust or moisture can enter the mount during the swap.
For photographers who shoot macro occasionally — a few times per month rather than as a primary genre — extension tubes on a fast prime represent the best cost-to-quality ratio in close-up photography. A set of electronic extension tubes (maintaining autofocus and aperture control) runs in the budget tier for most camera systems.
Close-Up Filters: The Simplest Entry Point
Close-up filters are magnifying elements that screw onto the front of a lens like a UV filter. They come in diopter strengths — +1, +2, +4, +10 — with higher numbers producing greater magnification. A +4 close-up filter on a 50mm lens yields roughly 0.2x magnification. Stack a +4 and a +2 for +6 total diopter strength and you approach 0.3x.
Single-element close-up filters are cheap but optically compromised. They add chromatic aberration (color fringing) and soften image edges. At the center of the frame, results can be acceptable. At the edges, quality drops off quickly. Stop down to f/8 or smaller to mitigate the worst softness, but the center-to-corner quality gap remains.
Achromatic close-up filters use two glass elements (a converging and diverging pair) to correct chromatic aberration. The Raynox DCR-150 and DCR-250 are the most widely used examples. They clip onto the lens front rather than threading, and they deliver noticeably better image quality than single-element alternatives. The DCR-250 provides approximately +8 diopters, enough for roughly 0.5x magnification on a 50mm lens. For the price, it is the most cost-effective macro accessory available.
Close-up filters maintain infinity focus (you can simply unscrew them), preserve autofocus, and add no weight worth mentioning. Their weaknesses are optical: even the best achromatic filters cannot match a dedicated macro lens for edge-to-edge sharpness and contrast. They are best suited for web-resolution images, social media content, and exploration — discovering whether macro appeals to you before committing to a dedicated lens.
Bellows: Maximum Magnification for Specialists
A bellows is an accordion-like extension between camera and lens, offering continuously variable extension from near-zero to 150mm or more. At maximum extension with a 50mm lens, a bellows can exceed 3:1 magnification — three times life-size on sensor. This puts it in the territory of optical microscopes.
Bellows are manual-everything devices. No electronic communication between lens and body. No autofocus. No automatic aperture. You set the aperture ring on the lens (if it has one), compose through a dim viewfinder, and focus by adjusting the bellows extension or moving the entire assembly on a rail.
Modern macro photographers rarely use bellows because extension tubes and dedicated macro lenses have replaced most of their use cases. Bellows still appear in extreme macro setups — photographing circuit board solder joints, mineral crystal structures, or biological specimens — where magnifications beyond 2:1 are needed and the slow, deliberate workflow is acceptable.
Lighting for Macro: Ring Flashes, Twin Flashes, and Continuous LED
At macro distances, ambient light is almost never sufficient. The lens itself blocks light from reaching the subject. Stopping down to f/11 for depth of field cuts exposure further. And shutter speeds must stay fast enough to freeze both camera shake and subject movement. Flash is the standard solution.
Ring flashes mount around the front element of the lens and cast nearly shadowless light on the subject. This is useful for documentation and dental photography where even illumination matters more than dimensionality. For creative macro — insects, flowers, art — ring flash produces flat lighting that many photographers find sterile. The telltale ring-shaped catchlight in reflective surfaces is another giveaway.
Twin flash systems (Canon MT-26EX-RT, Nikon R1C1, third-party alternatives) mount two small flash heads on either side of the lens barrel. Each head can be adjusted independently for power and angle, creating directional light with shadows that reveal texture and three-dimensional form. Most professional macro photographers prefer twin flash over ring flash for this reason. The ability to feather one head down while pushing the other creates lighting ratios that give subjects depth.
Continuous LED panels and ring lights offer what-you-see-is-what-you-get lighting — the preview through the viewfinder matches the final exposure. They are weaker than flash, which limits their use to stationary subjects at close range. For focus stacking sessions where each frame must match the previous one exactly, continuous light avoids the subtle color temperature and output variations that can occur between flash pops.
A handheld diffused speedlight remains the most adaptable macro lighting tool. Hold the flash in your left hand, the camera in your right, and angle the light to create side or top illumination. A small diffuser — even a piece of tissue paper taped over the flash head — softens shadows. This approach is faster to set up than any bracket-mounted system, and it works for field macro where carrying a twin flash kit is impractical.
Tripods and Focus Rails: Stability at High Magnification
At 1:1, camera shake that is invisible at normal shooting distances becomes the dominant source of blur. The rule of thumb for handheld minimum shutter speed (1/focal-length) does not apply at macro distances — the effective magnification amplifies vibration far beyond what focal length alone predicts. A 100mm macro at 1:1 behaves more like a 200mm lens for the purpose of shake calculation.
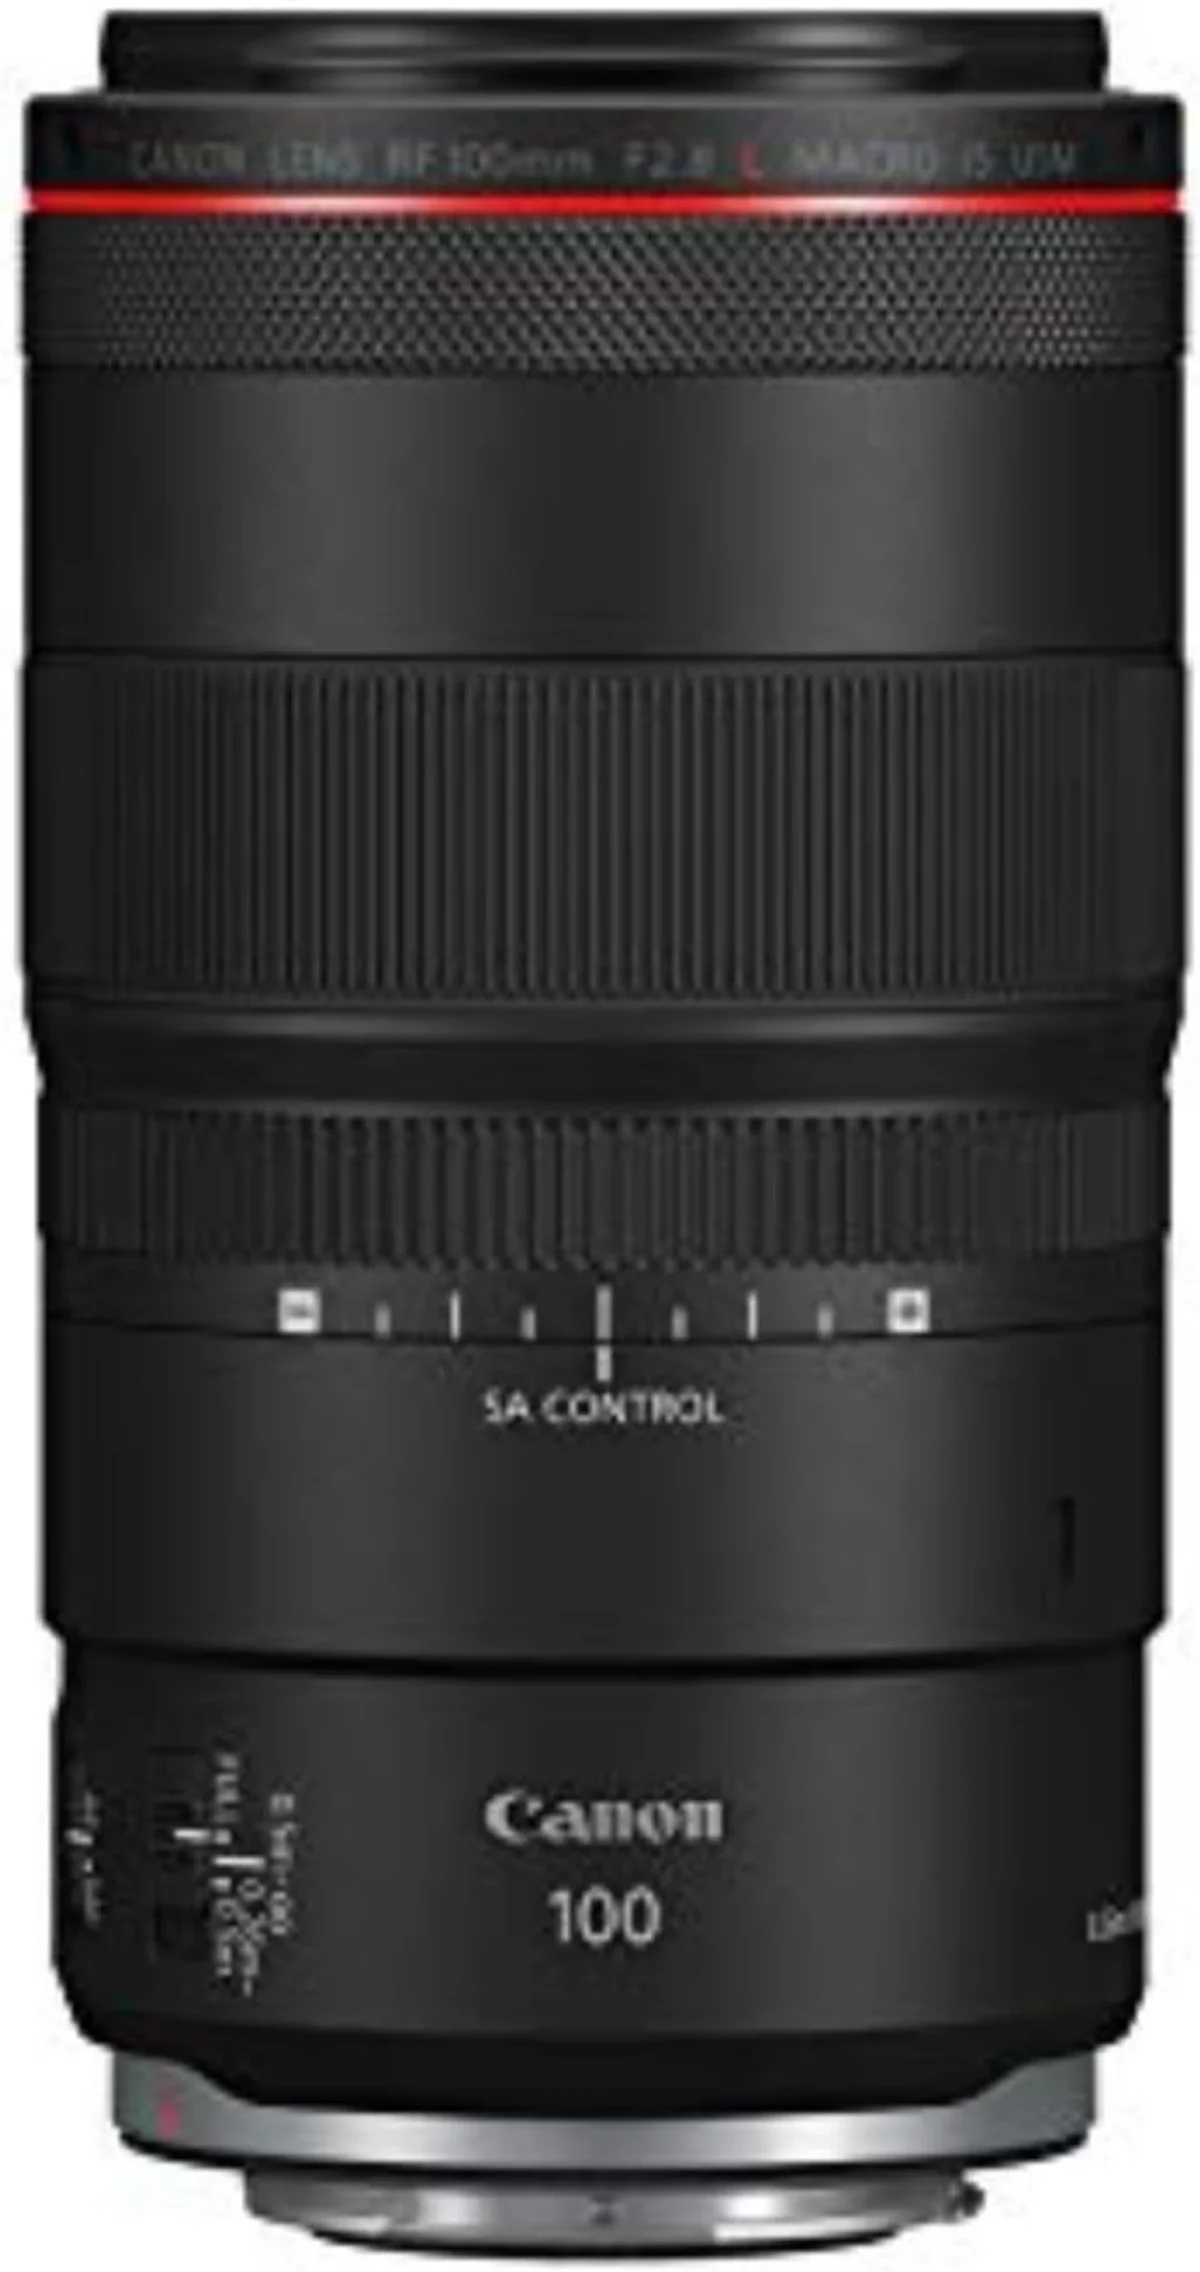
Image stabilization helps for handheld macro but cannot eliminate the problem. Canon's RF 100mm Macro includes a hybrid IS system with a dedicated macro mode that stabilizes in the yaw and pitch axes while displaying a stabilized framing guide in the viewfinder. Even with this system, handheld 1:1 shots at 1/200 second show noticeably less pixel-level sharpness than tripod-mounted shots at the same settings.
A focus rail mounts on top of a tripod head and lets you slide the entire camera-and-lens assembly forward or backward in precise increments.
This is fundamentally different from turning the focus ring: rotating the focus ring changes the optical path inside the lens, which at macro distances also slightly changes magnification and framing. Moving the entire camera on a rail keeps magnification constant while shifting the focal plane. For focus stacking, rail-based movement produces cleaner merges because frame-to-frame alignment remains consistent.
Geared tripod heads complement focus rails by providing fine control over composition. A ball head is fast to reposition but difficult to adjust by 1-2 degrees without overshooting. A geared head (Arca-Swiss, Manfrotto 410, or similar) lets you dial in tiny angular changes with knobs — a better match for the precision that macro work demands.
Autofocus vs. Manual Focus: When Each Approach Wins
Macro photography splits into two distinct AF scenarios, and the right approach depends on the subject.
For stationary subjects — flowers, products, coins, minerals — manual focus is faster and more precise. Set the lens to approximate magnification, lock the focus ring, and fine-tune by moving the camera on a rail or rocking your body slightly. The subject does not move, so you have unlimited time to nail focus. Autofocus in this scenario adds nothing and often hunts as it searches for contrast at close range.
For live insects and small animals, autofocus becomes valuable.
A bee on a flower holds still for 2-3 seconds at most before repositioning. Recomposing and manually focusing in that window is possible but demands practice. Modern macro lenses with fast linear motors (Canon's Nano USM, Sony's XD Linear) can lock focus at close range faster than older designs. Continuous AF tracking on recent mirrorless bodies can follow a moving insect across the frame, though hit rates at 1:1 remain lower than at normal shooting distances — expect 40-60% keepers rather than the 90%+ typical at portrait range.
A full-time manual focus override is non-negotiable for macro. Even with AF engaged, you often need to grab the focus ring and override the system when it locks onto the wrong plane — a wing edge instead of an eye, a petal tip instead of the stamen. Every modern macro lens supports this, but older screw-drive AF designs require flipping a switch to change modes. Electronic focus-by-wire lenses allow override at any time without switching.
Sensor Size and Effective Magnification: Why Crop Sensors Excel
A 1:1 macro lens projects the same physical image size regardless of sensor format. But a smaller sensor captures a tighter crop of that image, effectively increasing the apparent magnification in the final photo.
On an APS-C sensor (1.5x or 1.6x crop), a 1:1 macro lens produces images equivalent to 1.5-1.6x on full frame. On Micro Four Thirds (2x crop), the equivalence is 2:1. This is free magnification — no additional glass, no light loss, no extra expense. The subject appears larger in the frame without any optical penalty beyond the smaller sensor's inherent resolution and noise characteristics.
Diffraction limits also shift with sensor size. Smaller photosites on crop sensors hit diffraction softening at wider apertures — f/8 to f/11 on APS-C compared to f/11 to f/16 on full frame. This means crop sensor macro shooters have a narrower usable aperture range before diffraction takes its toll. The magnification advantage offsets this: you need less magnification (and can use slightly wider apertures) to fill the frame with the same subject.
Olympus/OM System has built a strong following among macro photographers partly because of the Micro Four Thirds format. Their 60mm f/2.8 Macro reaches 1:1 natively — equivalent to 2:1 on full frame — and focus stacking is built into the camera body. Combined with the system's compact size and excellent image stabilization, it is a compelling macro platform for photographers who prioritize magnification and portability over low-light performance.
Dedicated Macro Lenses Worth Researching
The Canon RF 100mm f/2.8L Macro IS USM brings a feature unique in the macro category: a spherical aberration (SA) control ring.
Rotating this ring shifts the character of out-of-focus areas between soft and firm rendering. In practical terms, it lets you tune bokeh quality for the specific background behind your subject — softer for busy foliage, firmer for clean studio backdrops. This is a creative tool that no other macro lens offers, and it doubles as an excellent portrait lens at normal focus distances.
Laowa produces several manual-focus macro lenses that push magnification beyond 1:1 without bellows or reversing rings. The Laowa 100mm f/2.8 2x Ultra Macro reaches 2:1 — twice life-size — in a standard lens barrel with an aperture ring. Their 25mm f/2.8 Ultra Macro reaches 5:1. These are specialty tools for photographers who have outgrown 1:1 and need higher magnification without the complexity of a microscope adapter.
The Sigma 105mm f/2.8 DG DN Macro Art is among the sharpest macro lenses ever tested at normal and close-focus distances. It uses a floating element design that maintains correction as focus changes — a problem that plagued older macro lenses, which were optimized for infinity and lost sharpness at close range. The stepping motor provides fast, quiet AF suitable for both macro and general photography.
Tamron's 90mm f/2.8 Macro has been a budget-tier favorite for decades, and the current Di III version for mirrorless mounts continues that tradition. It is lighter than most 100mm macro lenses, sharp enough for professional work, and priced well below Canon, Nikon, and Sony native options. Optical stabilization is built in, which helps for handheld close-up work at magnifications below 0.5x.
Insect, Flower, and Product Macro: Different Subjects, Different Demands
Insect macro demands speed. Subjects move, fly, or crawl out of frame. Working distance determines how easily you spook them. Autofocus tracking is useful but inconsistent at high magnification. The best insect macro photographers develop a muscle-memory technique: set the lens to roughly the right magnification, move the camera toward the subject, and fire a burst when the focus plane sweeps across the eyes. Flash is almost mandatory because shutter speeds must stay fast and apertures narrow. A diffused speedlight at 1/8 power freezes wing beats and insect movement while providing enough light to shoot at f/11.
Flower macro is the opposite: slow, deliberate, and forgiving.
Subjects hold still (assuming no wind). You can compose on a tripod, adjust lighting, and shoot focus stacks of 50 or more frames. The creative challenge is not technical — it is finding compositions that transcend the ordinary. Backlit petals, water droplets acting as lenses, and extreme close-ups of pollen structures require artistic vision more than fast reflexes. Morning dew and overcast skies provide ideal conditions: soft light, calm air, and natural moisture on petals.
Product macro — jewelry, watches, electronics, food ingredients — takes place in a controlled environment. Studio lighting eliminates ambient variability. Focus rails and geared heads provide repeatable positioning. The demands here are consistency and precision: every frame must match the brand's color standard, every shadow must fall where the art director intends, and every surface must render with accurate texture. A 100mm macro on a tripod with twin flash and a focus rail handles 90% of commercial product macro assignments.
Building a Macro Kit at Different Budget Levels
Entry level: A Raynox DCR-250 achromatic close-up filter on your existing lens. This option costs less than a restaurant dinner and delivers 0.5x-range magnification with acceptable center sharpness. Add a budget tripod if you do not own one. This kit answers the question "do I enjoy macro?" before you invest further.
First dedicated setup: A set of electronic extension tubes plus a 50mm f/1.8 prime (if you already own one). This combination reaches 0.5x to 0.75x with good image quality and functional autofocus. Total cost stays well within the mid-range tier. The limitation is working distance — a 50mm on tubes requires you to be very close to the subject.
Serious macro: A 100mm f/2.8 macro lens (Canon, Nikon, Sony, Sigma, or Tamron) provides true 1:1, comfortable working distance, and dual use as a short telephoto for portraits and general photography. Add a twin flash bracket or a handheld speedlight with a diffuser. Add a focus rail if you plan to focus-stack.
Advanced and specialized: A 180mm macro for insect and wildlife subjects, or a Laowa 2x or 5x lens for extreme magnification. A motorized focus rail for automated stacking. A macro bellows for continuously variable extension. At this level, you are building a system tailored to a specific macro niche, and each addition targets a precise gap in your capability.
One piece of advice applies at every tier: master lighting before upgrading glass. A mid-range macro lens with good flash technique produces better results than a premium lens in ambient light. Flash freezes motion, provides depth-of-field-enabling apertures, and illuminates subjects that the lens barrel would otherwise shadow. It is the single highest-impact addition to any macro kit.
Common Macro Photography Questions
Answers to the technical and gear questions we see most from photographers getting into macro work.
What does "true macro" mean on a lens?
True macro means the lens can reproduce a subject at 1:1 magnification — life-size on the sensor. A bug that measures 10mm in real life projects as a 10mm image on your camera sensor. Many lenses labeled "macro" only reach 0.5x or 0.25x magnification, which is close-up photography rather than true macro. Check the spec sheet for maximum magnification ratio before buying. If it says 1:1 or 1.0x, it is a genuine macro lens. Anything below 0.5x is marketing language.
Do extension tubes reduce image quality?
Extension tubes contain no glass, so they do not add optical aberrations to your lens. Image quality depends entirely on the lens itself. You will lose some light — typically 1 to 2 stops depending on tube length — and autofocus may slow down or stop working, but sharpness, contrast, and color rendition remain unchanged. The main practical limit is that extension tubes reduce your maximum focus distance, so you lose the ability to focus at infinity. Use them on a standard prime or zoom for occasional close-up work without investing in a dedicated macro lens.
Is manual focus or autofocus better for macro photography?
Manual focus gives you more precise control at high magnifications where depth of field is measured in fractions of a millimeter. Most macro photographers focus manually by setting a rough distance on the lens, then rocking their body forward and backward to fine-tune the focus plane. Autofocus is useful for macro subjects that move — live insects, for example — but AF systems often hunt at close distances because the contrast changes rapidly at high magnification. If you shoot still subjects like flowers, jewelry, or products, manual focus is faster and more reliable.
Why are my macro photos soft even though I focused carefully?
At 1:1 magnification, depth of field at f/2.8 is less than 1mm. Even breathing can shift your focus plane enough to miss. Three solutions help. First, use a tripod and a focus rail for precise adjustments. Second, stop down to f/8 or f/11 for more depth of field — diffraction softening at these apertures is less damaging than missed focus at f/2.8. Third, learn focus stacking: shoot 20 to 50 frames at slightly different focus distances and merge them in software. Focus stacking is the standard technique for sharp macro images with front-to-back detail.
What is the difference between a 60mm and a 100mm macro lens?
Both reach 1:1 magnification, but working distance is the key difference. A 60mm macro must be roughly 9cm from the subject at 1:1. A 100mm macro gives about 15cm of clearance. Longer working distance matters for insects (you are less likely to scare them away), for lighting (more room to place a flash or reflector between the lens and subject), and for product photography (the lens casts less shadow on the subject). A 180mm macro pushes working distance to 25cm or more, but weighs considerably more and costs nearly twice as much as a 100mm.
Can I use close-up filters instead of a macro lens?
Close-up filters screw onto the front of any lens and reduce its minimum focus distance, allowing higher magnification. Single-element close-up filters add noticeable softness and chromatic aberration, especially at the edges. Dual-element achromatic close-up filters (like the Raynox DCR-250) perform much better and cost a fraction of a dedicated macro lens. They are a practical entry point for photographers who want to try macro without a large investment. For serious macro work published at large sizes or cropped heavily, a dedicated macro lens still produces cleaner results.
How does sensor size affect macro magnification?
A 1:1 macro lens projects the same size image on any sensor, but a smaller sensor crops tighter. On an APS-C camera, a 1:1 macro lens shows a field of view equivalent to 1.5x or 1.6x on full frame — effectively giving you more magnification without any optical penalty. Micro Four Thirds doubles the effective magnification to 2:1 equivalent. This is why many dedicated macro shooters use crop-sensor bodies: they get tighter framing and more apparent detail without buying specialized super-macro lenses.
Our Top Recommendation
Based on our research, the Canon RF 100mm f/2.8L Macro is our top pick — macro photography, portraits with controlled bokeh.
Get Our Top 3 Picks
Get our top 3 picks for your budget — one email, then only updates.
Only when something changes. Unsubscribe anytime.