Lenses for Wildlife & Birding Photography
Wildlife and birding photography is a focal-length arms race — and the lens you choose matters more than the camera body behind it. A 600mm lens on a five-year-old body will outperform a 200mm lens on the latest flagship in nearly every field scenario. Reach is the non-negotiable starting point, but once you have enough focal length, the hierarchy shifts to autofocus speed, stabilization quality, and aperture.
We've analyzed hundreds of wildlife images across forums, field reports, and competition entries to identify what separates usable bird photography gear from gear that frustrates. This guide walks through the optical, mechanical, and practical factors that determine whether a lens earns its place in a wildlife photographer's bag — or gets sold within six months.

The 400mm Floor: Why Focal Length Comes First
Most birds are small, skittish, and maintain a flight distance of 10-30 meters from humans. A house sparrow at 15 meters occupies roughly 120 pixels of height on a 45-megapixel full-frame sensor at 200mm. At 500mm, that same bird fills 300 pixels — enough for feather detail, eye contact, and a printable image. The math is unforgiving: doubling focal length quadruples the subject area in your frame.
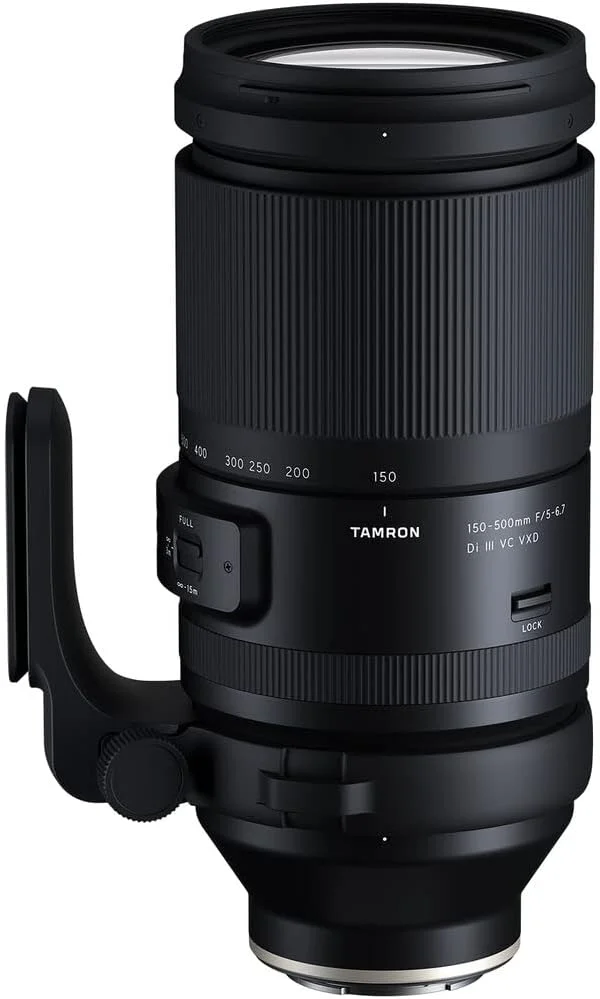
The Tamron 150-500mm f/5-6.7 is our top pick for wildlife because it hits 500mm — well above the 400mm floor — in a package that weighs 1.7kg and costs less than many 100-400mm alternatives. At 500mm, songbirds at 20 meters fill enough of the frame for detailed keeper images. Drop to 300mm, and those same birds become tiny subjects surrounded by negative space, requiring heavy cropping that degrades resolution.
For dedicated birders, 600mm is the target. The Nikon Z 180-600mm, Sony FE 200-600mm, and Canon RF 200-800mm all deliver 600mm in a zoom package. These lenses weigh 2-2.2kg and represent the practical limit for extended handheld birding. Beyond 600mm, you're entering super-telephoto prime territory — 800mm f/5.6 and 600mm f/4 lenses that demand tripods, gimbal heads, and budgets measured in thousands.
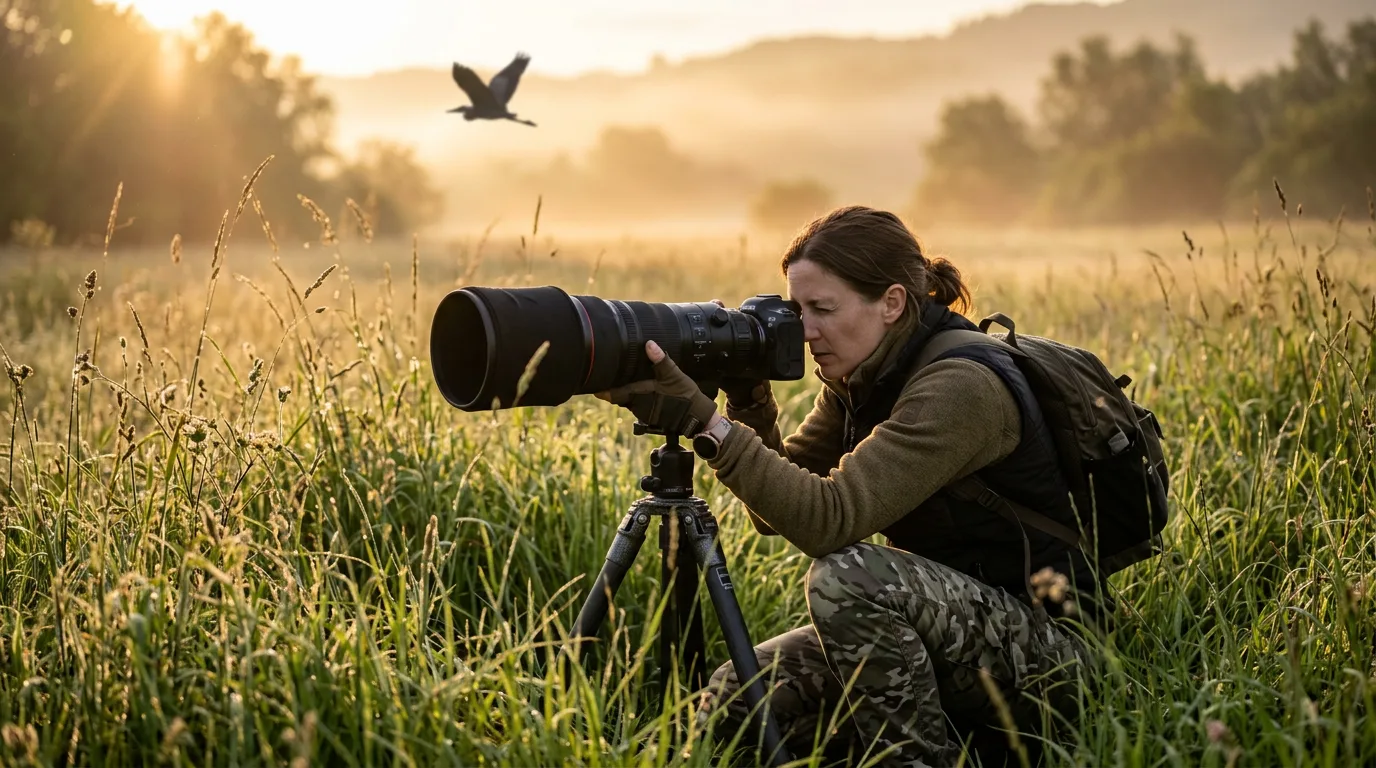
Wildlife, birding, and aviation photography on Sony
Stabilization: The Difference Between Sharp and Blurred at 500mm
The reciprocal rule suggests a minimum handheld shutter speed equal to 1/focal-length — 1/500s at 500mm. Without stabilization, every shot below that threshold risks motion blur from hand tremor. Lens-based optical image stabilization (OIS) extends this limit by 3-5 stops, meaning a stabilized 500mm lens can produce sharp handheld images at 1/60s-1/125s in controlled conditions.
That stabilization headroom translates directly to lower ISO settings. At dawn in a forest hide, a stabilized lens at 1/125s and ISO 3200 produces cleaner files than an unstabilized lens forcing 1/500s at ISO 12800. The noise difference between those ISO values is visible in every feather barb and eye reflection.
Lens-based OIS outperforms body-based IBIS at telephoto focal lengths.
Sensor-shift IBIS systems run out of physical travel at long focal lengths — the sensor can only move so far on its mount. A lens-based IS element is designed for the specific optical path of that lens, with correction range matched to its focal length. The optimal setup combines both: lens OIS handles the bulk of correction while body IBIS refines the remaining low-frequency vibration. Canon, Nikon, and Sony all support this coordinated IS on compatible lens-body pairs, delivering 5-6 combined stops.
For video — increasingly common even among stills-focused wildlife photographers — telephoto stabilization determines whether footage is usable. A 400mm handheld video clip without IS is unwatchable. Modern wildlife lenses include video-specific IS modes that prioritize smooth panning over maximum still-image correction. If you plan to capture any video of animal behavior, a dedicated IS mode is a feature worth screening for.
Autofocus Speed and Tracking: The Keeper-Rate Multiplier
A bird in flight crosses the frame at 500mm in under a second. The AF system must acquire the subject, achieve initial focus, and then track it continuously as distance changes frame-by-frame — often while the bird changes direction, altitude, and speed unpredictably. Slow or inaccurate AF produces a memory card full of almost-sharp images that look fine on the camera's rear LCD but fall apart at 100% on screen.
Three variables control AF performance in wildlife photography. The lens motor is first. Linear motors (Canon Nano USM, Sony XD Linear, Tamron VXD, Nikon STM) move focus elements rapidly with minimal mechanical lag. Older screw-driven and micro-motor designs cannot match the acquisition speed required for erratic flight paths. If you are buying a wildlife lens in 2026, linear motor drive should be a baseline requirement.
The camera body's AF processor is second.
Current-generation bodies — Sony A7R V, Canon R5 II, Nikon Z8, and their APS-C counterparts — use dedicated AI processors trained on hundreds of thousands of bird images. These systems identify species-specific body shapes and lock onto eyes even against complex backgrounds like tree canopies and reed beds. The generation gap is dramatic: a 2020-era body with contrast-detect AF on a third-party lens might deliver 15-20% keeper rate on birds in flight, while a 2024-era body with dedicated bird detection on a native lens pushes that rate above 60%.
Available light is the third factor, and it connects directly to lens aperture. AF sensors need photons to calculate distance. A lens at f/5.6 gives the AF module twice the light of one at f/8 — and four times the light of f/11. In the dim, dappled light of a forest canopy at dawn, the wider-aperture lens acquires focus noticeably faster. For woodland birding, where light is always limited, this aperture-AF relationship is the strongest argument for spending more on a faster lens.
Aperture and Low-Light Performance: Dawn, Dusk, and Forest Shade
The most productive wildlife photography happens at the edges of the day. Birds are most active in the first two hours after sunrise and the last hour before sunset. Mammals emerge from cover at dusk. Forest species live permanently in shade that drops ambient light by 2-3 stops compared to open terrain. All of this means wildlife photographers regularly shoot in light levels that push camera systems to their limits.
Aperture tiers for wildlife lenses separate into distinct performance bands. At f/4, a 400mm or 600mm prime delivers professional results from pre-dawn through dusk. These are the lenses used by National Geographic contributors and competition winners — and they carry price tags that reflect that capability, typically in the premium bracket above most enthusiast budgets.
The f/5.6-6.7 range covers the majority of wildlife zoom lenses: Tamron 150-500mm (f/5-6.7), Nikon Z 180-600mm (f/5.6-6.3), Sony FE 200-600mm (f/5.6-6.3). In good outdoor light, these lenses produce sharp, detailed images indistinguishable from those shot on faster glass. The gap appears at dawn and dusk, where ISO needs to climb to 6400-12800 to maintain action-stopping shutter speeds. Modern sensors handle these ISO values acceptably, but feather detail and tonal smoothness degrade compared to images shot at ISO 800-1600 on a faster lens.
Budget telephotos reaching f/7.1-8 at the long end (Canon RF 100-400mm f/5.6-8, Canon RF 75-300mm f/4-5.6) function as daylight-only wildlife tools. At f/8, many cameras restrict AF to center-point only, and ISO requirements climb steeply before the light fades. These lenses work for backyard bird feeders in sunshine and open-field wildlife at midday. For anything earlier, later, or deeper in the woods, the light penalty is too steep.
Handheld, Monopod, or Tripod: Matching Support to Your Lens
Support choice is a function of lens weight and shooting style, not focal length alone. A 1.7kg 150-500mm zoom is handheld-friendly for 2-3 hour sessions, while a 3.2kg 600mm f/4 prime demands a tripod and gimbal head regardless of the photographer's physical conditioning.
Handheld shooting (lenses under 2kg) offers maximum agility.
You can track birds across the sky, reposition in seconds, and walk through habitat without managing tripod legs on uneven ground. The limitation is fatigue — holding 3-4kg of camera and lens at eye level for extended periods causes arm shake that degrades sharpness progressively. A common technique: support the lens barrel with your left palm from underneath, tuck your left elbow against your ribs, and exhale before firing a burst. This bracing technique adds 1-2 stops of effective stabilization beyond what the lens IS provides alone.
Monopods split the difference between freedom and stability. A monopod removes vertical shake (the dominant axis of hand tremor) while allowing full 360-degree panning. For bird-in-flight photography from a fixed position — a beach, a riverbank, a raptor watchpoint — a monopod with a tilt head is the most practical support system. Weight transfers to the monopod rather than your arms, extending shooting endurance from hours to an entire day.
Tripods with gimbal heads are mandatory for super-telephoto primes. A gimbal head balances the lens at its center of gravity so the entire rig floats neutrally — you can release the lens and it stays pointed wherever you left it. Tracking a flying bird becomes a smooth, effortless pan rather than a fight against gravity. The trade-off is setup time and immobility. A tripod-mounted 600mm f/4 produces the sharpest wildlife images possible, but you cannot quickly walk 50 meters to a better vantage point.
Hide Photography: Getting Close Without Being Seen
The most effective way to increase subject size in wildlife photography isn't buying a longer lens — it's reducing the distance to your subject. A portable hide (also called a blind) lets you sit within 5-10 meters of a feeding station, nest site, or waterhole. At 5 meters, a 300mm lens produces images equivalent to a 1500mm lens at 25 meters, with far better image quality because atmospheric haze, heat shimmer, and air turbulence all increase with distance.
Pop-up hides cost between the budget and mid-range tiers and set up in under five minutes.
Position the hide 24-48 hours before your shoot and visit briefly to let birds habituate. Most species accept a stationary hide within one to two days if it doesn't move or emit unfamiliar sounds. Enter before dawn (birds count incoming humans and wait for you to leave) and stay until your session ends. Movement inside the hide must be slow and deliberate — fabric walls transmit motion outlines that alert wary species.
From a hide, your lens requirements shift. A 150-500mm zoom covers every framing need: 150mm for wide habitat shots, 300mm for full-body frames, and 500mm for tight head portraits showing individual feather structure. The ability to zoom rather than being locked to a single focal length makes zoom lenses more practical than primes for hide work, where you cannot adjust your position to reframe.
The Crop Sensor Advantage for Reach
APS-C and Micro Four Thirds cameras multiply effective focal length by their crop factor. A 500mm lens on a 1.5x APS-C body frames identically to a 750mm lens on full-frame. This 50% reach boost is free — no additional glass, no light loss, no added weight. For photographers who need maximum reach on a limited budget, an APS-C body paired with a long telephoto zoom is the most cost-effective path to frame-filling bird images.
The Canon R7 (1.6x crop, 32.5MP, advanced bird detection AF), Nikon Z50 II (1.5x crop, 20.9MP), and Sony A6700 (1.5x crop, 26MP) are the current standout APS-C bodies for wildlife. The Canon R7 in particular has earned a following among birders for its combination of high resolution, fast burst rate (15fps mechanical, 30fps electronic), and Canon's mature animal detection system. Paired with the Canon RF 100-400mm f/5.6-8, the effective range becomes 160-640mm in a package weighing just over 1kg.
The penalty is sensor-level performance. APS-C sensors collect roughly 40% less light per pixel than full-frame sensors at equivalent resolutions. At ISO 1600, both sensor sizes deliver clean images. At ISO 6400-12800 — common in dawn and dusk wildlife shooting — full-frame sensors produce noticeably cleaner files with better shadow detail. The crop sensor advantage is strongest in good light; in dim conditions, full-frame with a longer lens produces better final images despite the focal length disadvantage.
Micro Four Thirds takes the crop factor to 2x, turning a 300mm lens into a 600mm equivalent.
Panasonic and OM System (formerly Olympus) build bodies optimized for this reach advantage. The OM System OM-1 Mark II combines a 2x crop with advanced computational photography (Pro Capture mode, stacking) and weather sealing rated for professional field use. The sensor is small — 17.3 x 13mm versus 36 x 24mm for full-frame — and ISO performance is the most constrained of any current system. But in daylight, the reach-per-dollar ratio is unmatched.
Teleconverters: Extending Reach at a Cost
A 1.4x teleconverter increases focal length by 40% while losing one stop of light. A 2x teleconverter doubles focal length but costs two full stops. These are optical multipliers that sit between the camera body and the lens, and their quality varies dramatically between manufacturers and price tiers.
First-party teleconverters (Canon Extender RF 1.4x, Nikon Z TC-1.4x, Sony SEL14TC) are designed to work with specific telephoto lenses from the same manufacturer. They maintain full AF functionality (with speed reduction), preserve weather sealing, and introduce minimal optical degradation when paired with compatible lenses. A Nikon Z 100-400mm with the TC-1.4x becomes a 140-560mm f/6.3-8 — practical in good light and optically sound.
The practical limits of teleconverters appear in three areas.
Aperture loss compounds at the long end: a 500mm f/6.7 with a 1.4x TC becomes 700mm f/9.5, which many camera bodies cannot autofocus reliably. Optical quality degrades at the edges and wide-open — stop down one additional stop from maximum aperture for best sharpness. AF speed decreases measurably, reducing keeper rates on fast-moving subjects. Use a 1.4x TC as an occasional reach extender, not a daily-driver configuration. If you consistently need 700mm, buying a longer lens outperforms a shorter lens plus converter.
Matching Lenses to Wildlife Scenarios
Different wildlife subjects demand different optical configurations. A lens perfect for herons at a lakeside won't perform well tracking swallows overhead, and the setup for a forest owl is wrong for shorebirds on an open beach.
Backyard bird feeders and garden wildlife: 400-600mm range, handheld or window-mount. Subjects are close (5-15m) and generally stationary or slow-moving. A 100-400mm zoom or the Sigma 100-400mm f/5-6.3 DG DN OS provides enough reach without excessive magnification that makes framing difficult at close range. Stabilization matters more than AF speed here — birds perch long enough for single-shot AF to work.
Birds in flight over open water or fields: 150-600mm range, handheld or monopod. Speed is everything — fast continuous AF with bird eye detection, high burst rate (10fps minimum, 20fps preferred), and fast shutter speeds (1/2000s+). The Tamron 150-500mm or Sony FE 200-600mm paired with a body featuring advanced tracking AI produces the best keeper rates. Pan with the bird, keep the AF point on the body, and fire long bursts.
Forest and woodland species: 300-500mm range, often with a monopod. Light is consistently poor — f/4 or f/5.6 maximum aperture is strongly recommended. Push ISO as needed to maintain 1/500s minimum shutter speed. Birds in forest environments perch more than fly, so single-shot or slow-continuous AF works. The challenge is finding the bird through dense canopy, not tracking it. A shorter focal length (300-400mm) gives a wider field of view for locating subjects.
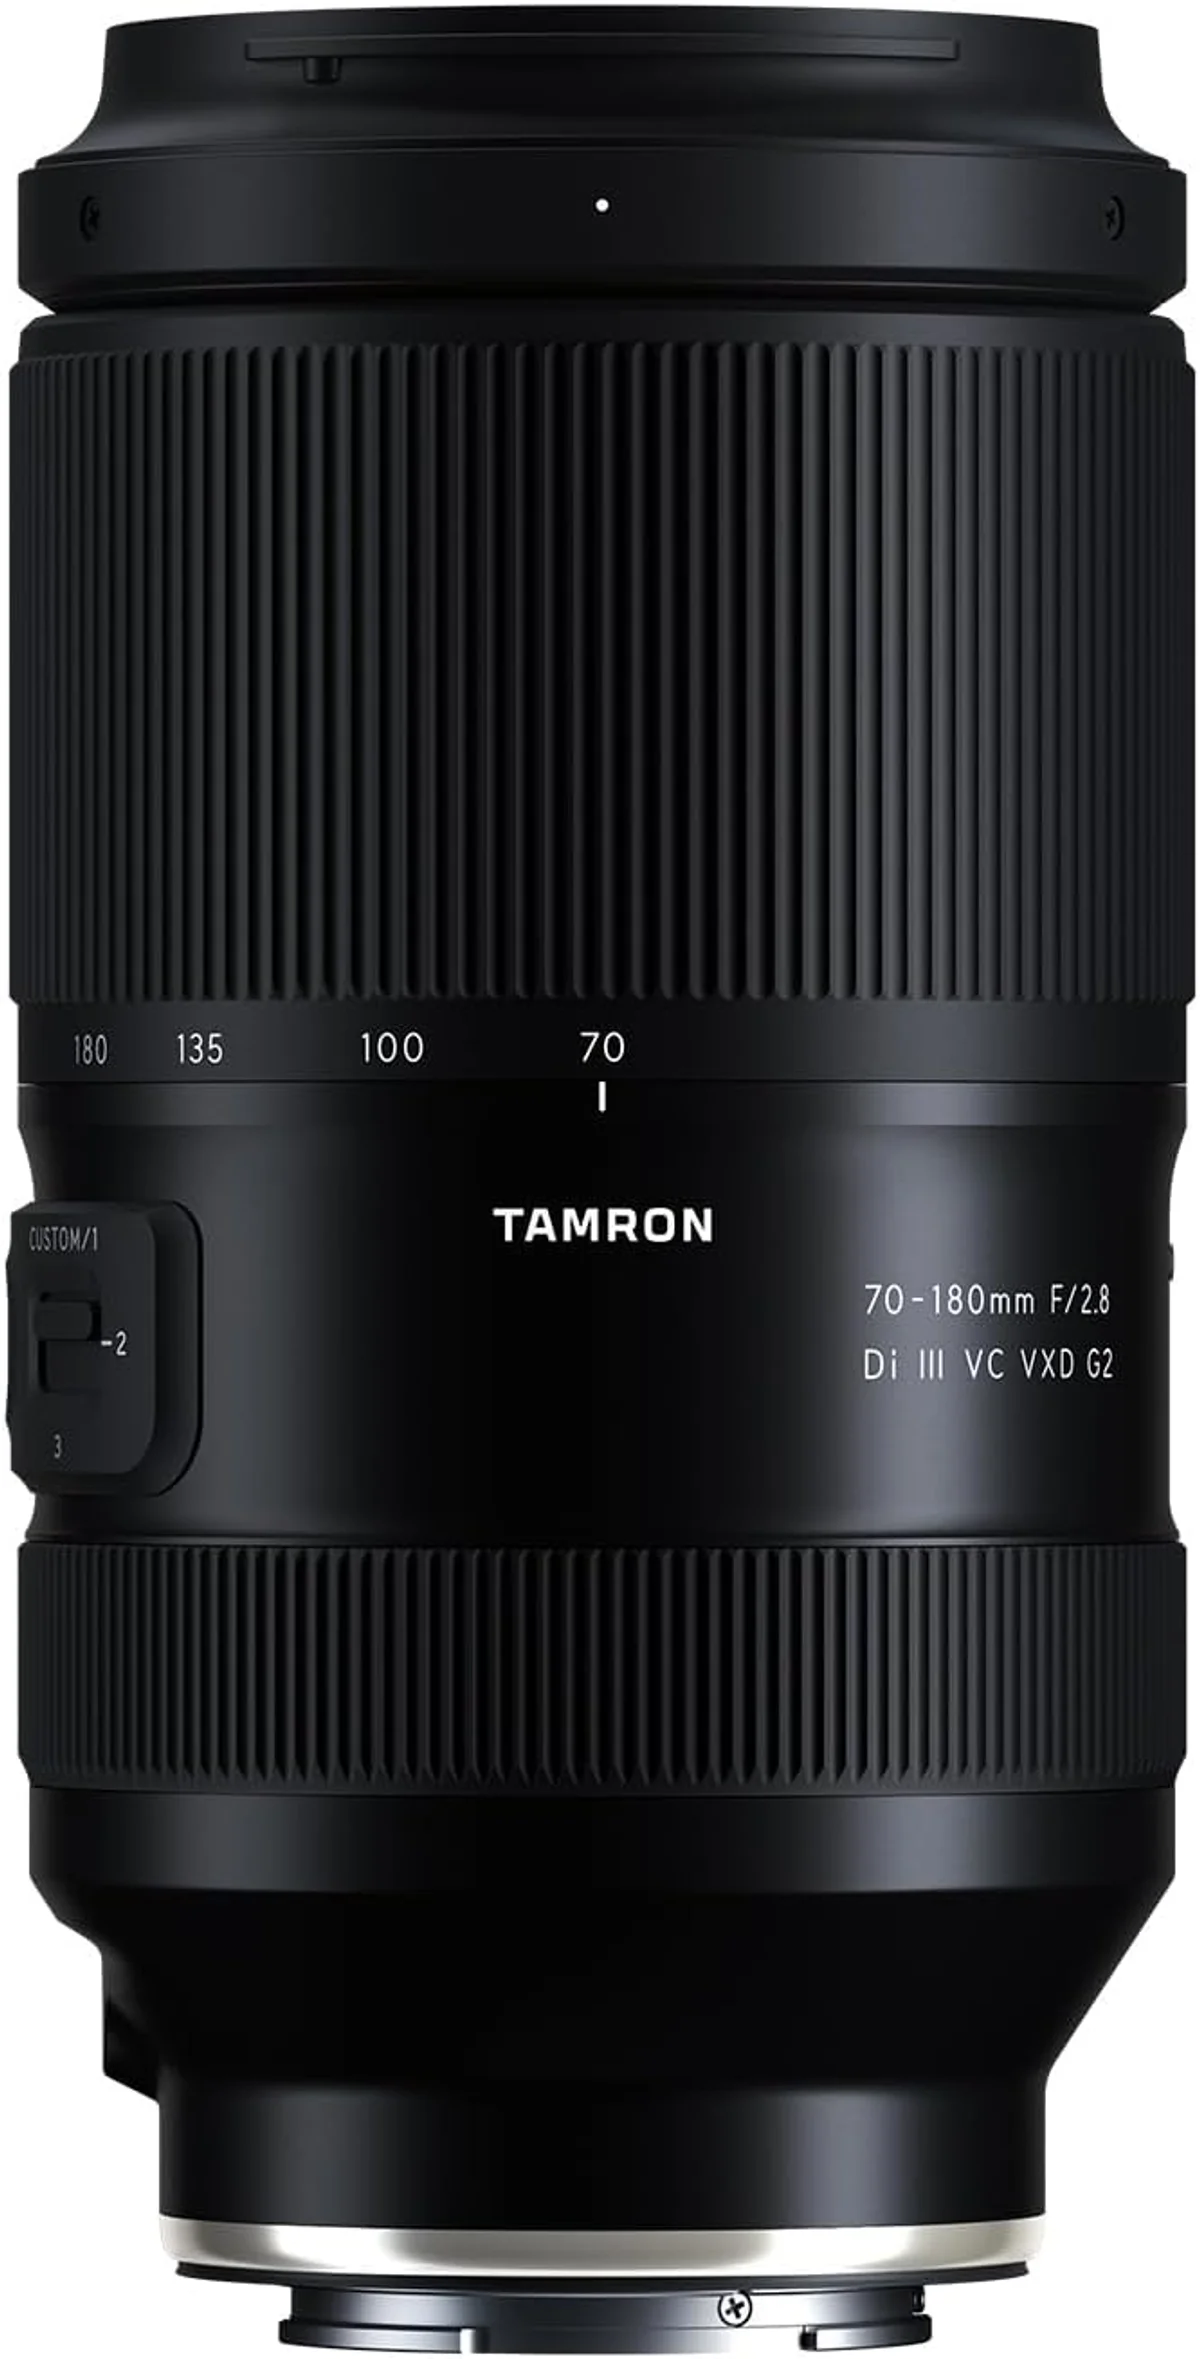
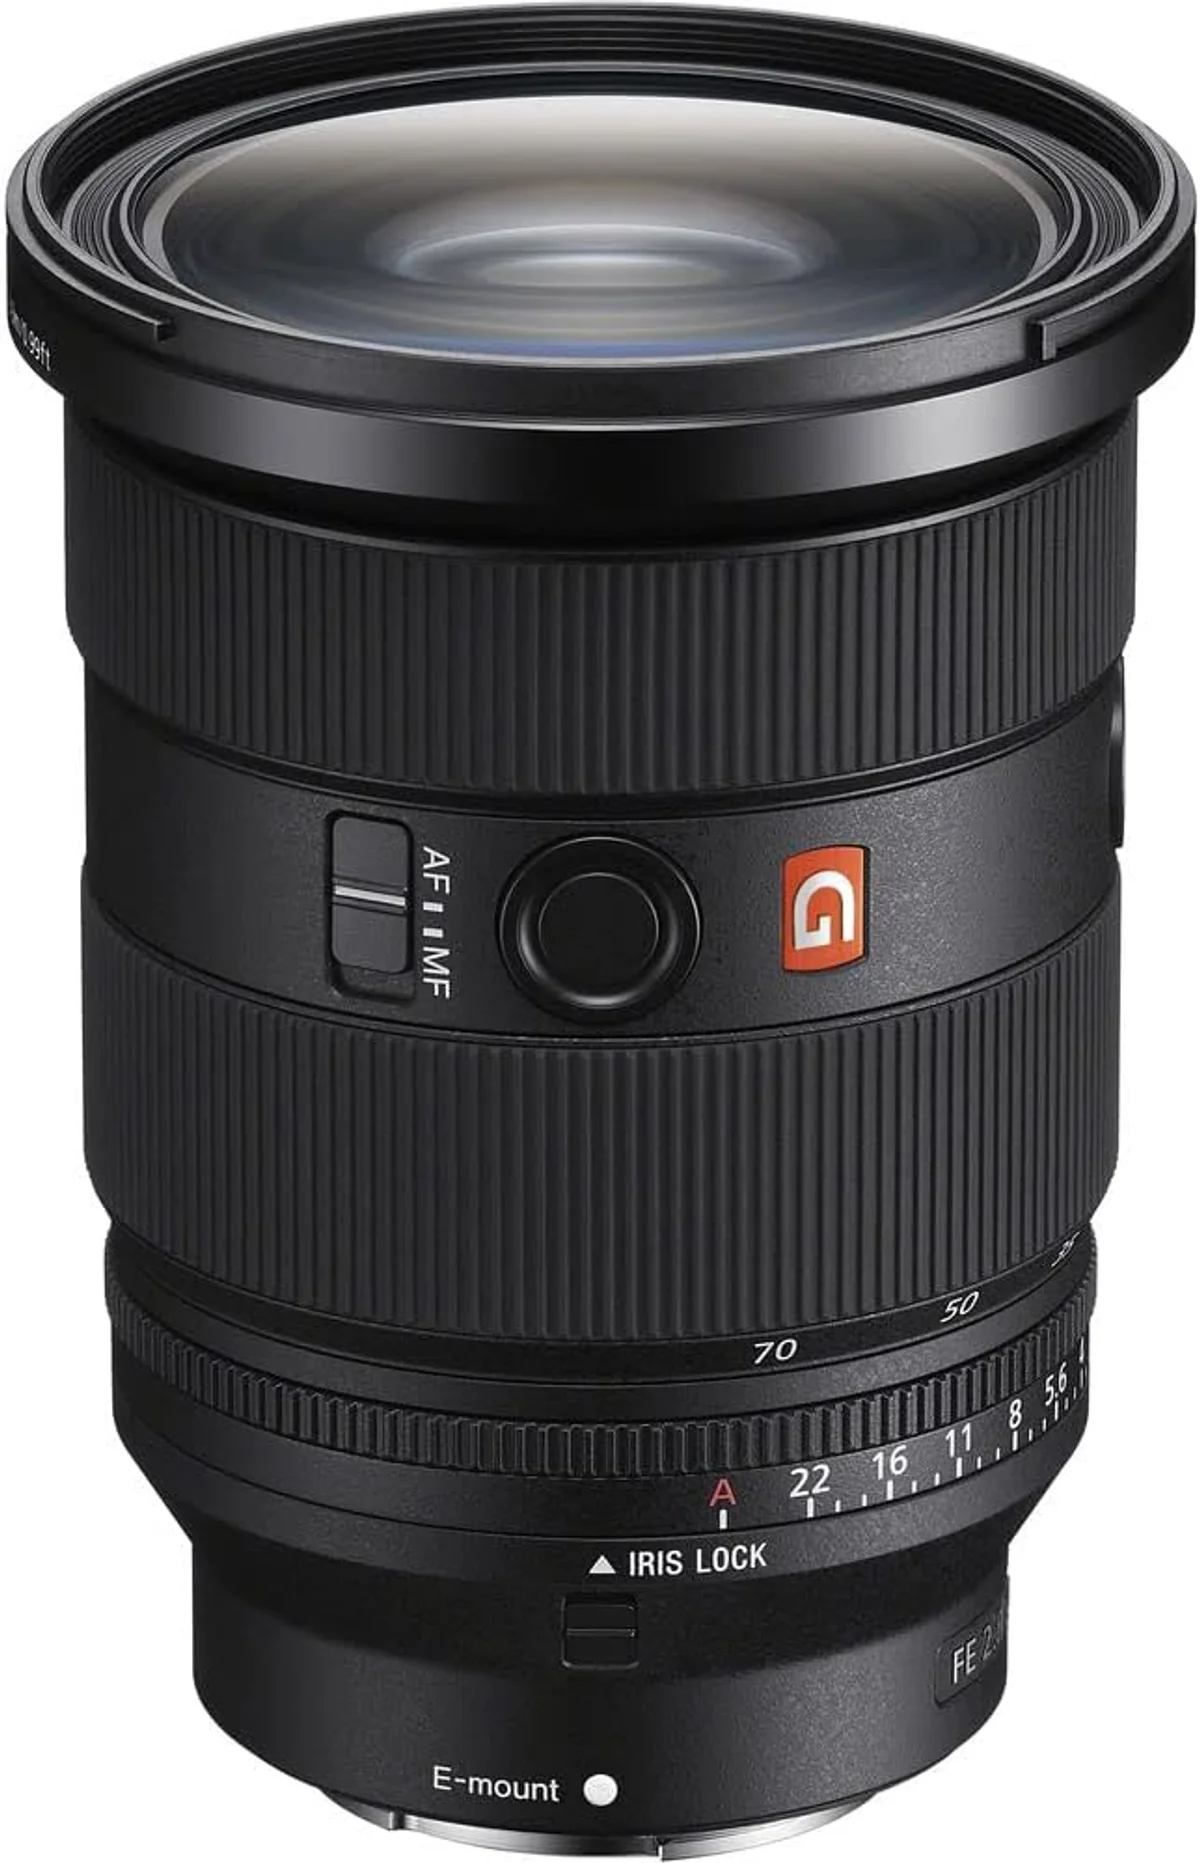
African safari and large mammals: 200-400mm covers most situations from a vehicle. Animals approach to within 10-20 meters of safari vehicles, and a 600mm lens is often too tight for large mammals at those distances. A 70-200mm f/2.8 plus a 100-400mm zoom covers the entire range. Weight restrictions on light aircraft in East Africa (typically 15kg per bag) favor lighter zoom lenses over heavy primes.
Hides and static positions: 150-500mm zoom for flexibility, or a 500mm+ prime for maximum quality. From a hide at 8 meters, 500mm delivers tight head portraits. The ability to zoom out to 150-200mm for behavioral sequences (feeding, courtship, nest building) makes zooms more practical than fixed focal lengths in this context.
Building a Wildlife Lens Kit on a Budget
The best entry point for wildlife photography is a single long telephoto zoom paired with an APS-C body. The Tamron 150-500mm on a Sony A6700 gives 225-750mm equivalent reach for a total system cost in the mid-range tier. This one-lens kit covers 90% of wildlife scenarios — from backyard feeders to lakeside wading birds to raptors soaring overhead.
Add a second lens only when the first limits you repeatedly. If you consistently find 150mm too tight for close animals or habitat shots, add a 70-200mm f/2.8 or a 24-105mm f/4. If low-light woodland birding demands more aperture, step up to the Nikon Z 100-400mm f/4.5-5.6 VR S or equivalent — the extra stop of light at the wide end makes dawn sessions more productive.
Resist the temptation to buy the longest possible focal length immediately. A 200-800mm f/6.3-9 sounds impressive on paper, but at f/9 and 800mm, usable conditions shrink to bright midday sun. A 150-500mm at f/6.7 is two stops faster than 800mm f/9 at the long end — those two stops translate to shooting an hour earlier at dawn and an hour later at dusk. For most wildlife photography, shooting during golden hour with a moderately long lens beats shooting at noon with an extremely long one.
Budget allocation also matters beyond the lens itself. A quality monopod, a rain cover for your gear, a comfortable strap system for long walks, and a memory card fast enough for burst shooting all contribute to keeper rates. Allocating 10-15% of your total budget to accessories rather than putting every dollar into optical glass produces better results in practice than maximizing lens spend alone.
Field Technique That Maximizes Your Lens
The best wildlife lens in the world produces mediocre images with poor technique. Conversely, experienced wildlife photographers produce striking images with mid-range gear because they understand how to extract maximum performance from their equipment.
Shutter speed discipline is the foundation. For perched birds, use 1/focal-length as a starting point: 1/500s at 500mm. For birds in flight, double that: 1/1000s minimum, 1/2000s preferred. For mammals walking or running, 1/1000s freezes motion cleanly. Set ISO to Auto with a ceiling of ISO 6400 (APS-C) or ISO 12800 (full-frame) and let the camera adjust for changing light conditions.
Back-button AF separates focus activation from the shutter button. Configure your camera so that pressing the rear AF-ON button engages continuous focus, and the shutter button only fires. This prevents the camera from refocusing when you half-press the shutter — if a branch passes between you and the bird, the AF doesn't jump to the branch. Release AF-ON to lock focus on a stationary subject; hold it continuously for tracking flight.
Exposure compensation is your constant companion in wildlife photography. Birds against bright sky need +1 to +2 stops of compensation to prevent underexposure. Dark animals in bright surroundings need -0.7 to -1 stop. Learn to adjust exposure compensation without removing your eye from the viewfinder — most modern bodies allow this via a dedicated dial or customizable control wheel.
Atmospheric conditions affect telephoto images more than most photographers realize. Heat shimmer from sun-warmed ground or water creates visible distortion at focal lengths above 300mm. Shoot early, when air is cool and still. Rain actually improves atmospheric clarity — the best wildlife images are often captured in light drizzle, when air is clean and animals are active. Haze and pollution reduce contrast and color saturation at long distances; a UV or haze filter helps marginally, but distance reduction helps more.
Our Top Pick for Wildlife and Birding
The Tamron 150-500mm f/5-6.7 Di III VC VXD earns our recommendation for its balance of reach, weight, stabilization, and value. At 500mm, it hits the focal length range where most bird photography becomes productive. At 1.7kg, it is handheld-manageable for multi-hour sessions. The VC stabilization system provides 4-5 stops of correction, enabling clean handheld shots at slow shutter speeds in dim conditions. VXD linear motor autofocus tracks birds in flight with the responsiveness that modern mirrorless bodies demand.
The 150mm wide end is broader than most super-telephoto zooms (which typically start at 200mm), giving more flexibility for close subjects and habitat context shots. The zoom range means you can photograph a heron at 10 meters (150-200mm) and a distant eagle at 100 meters (500mm) without changing lenses — a real advantage when moments are fleeting and lens swaps mean missed shots.
Available for Sony E and Nikon Z mounts, the Tamron 150-500mm represents one of the strongest value propositions in wildlife photography optics. Birders and wildlife photographers who previously needed to spend in the premium tier for 500mm reach can now access that focal length at a fraction of the historical cost.
Wildlife & Birding Lens Questions
These questions come up repeatedly in wildlife photography communities and field workshops. The answers reflect real-world shooting conditions rather than laboratory specifications — because specifications measure capability, but field conditions determine results.
What is the minimum focal length for bird photography?
400mm is the practical minimum for most bird photography. At shorter focal lengths, all but the largest birds (herons, eagles at close range) will occupy too few pixels for a detailed image. A 100-400mm zoom gets you started; 500-600mm is the sweet spot for songbirds and shorebirds. Crop-sensor cameras extend effective reach by 1.5-1.6x, so a 400mm lens becomes 600-640mm equivalent — a meaningful advantage for birders on a budget.
Can I shoot birds in flight handheld without a tripod?
Yes, and most bird-in-flight photographers prefer handheld shooting for tracking agility. Lenses under 2kg (like the Tamron 150-500mm at 1.7kg) are manageable for sessions of 1-3 hours. Use a shutter speed of 1/2000s or faster, enable continuous AF with animal/bird detection, and brace your elbows against your body. A monopod splits the difference — it removes vertical shake while still allowing quick panning. For super-telephoto primes above 3kg, a gimbal head on a tripod is the standard approach.
How does crop sensor help with wildlife photography?
A crop sensor (APS-C or Micro Four Thirds) multiplies effective focal length by its crop factor — 1.5x for most APS-C, 1.6x for Canon APS-C, and 2x for Micro Four Thirds. A 500mm lens on an APS-C body frames like a 750mm lens on full-frame. The downside: smaller pixels collect less light, increasing noise at high ISO. In bright daylight, the reach advantage is substantial. At dawn or in deep shade, full-frame sensors maintain cleaner images at the high ISOs wildlife photography demands.
Do I need a lens with weather sealing for wildlife photography?
Weather sealing is strongly recommended but not mandatory. Wildlife photography often means early mornings with dew, sudden rain, dusty trails, and salt spray near coastlines. Sealed lenses survive these conditions without moisture reaching internal optics. Budget lenses without sealing can still work — carry a rain cover ($15-30) and a large ziplock bag as emergency protection. Avoid changing lenses in wind or rain regardless of sealing level, as the exposed sensor and mount are vulnerable.
Is a 1.4x teleconverter worth buying for birding?
A 1.4x teleconverter adds 40% reach with a 1-stop light loss — a 500mm f/6.7 becomes 700mm f/9.5. Modern teleconverters from Canon, Nikon, and Sony maintain autofocus (often with reduced speed) and add minimal optical degradation when paired with compatible lenses. The cost is real: f/9.5 limits you to bright conditions, and AF tracking may slow noticeably. Buy a teleconverter as a reach extender for occasional use, not as a substitute for buying a longer lens.
What autofocus features matter most for wildlife?
Animal eye detection is the single most important AF feature for wildlife. Modern cameras from Sony (A7R V, A9 III), Canon (R5 II, R7), and Nikon (Z8, Z9) can identify and lock onto bird and animal eyes automatically, even in cluttered backgrounds. Beyond eye detection, continuous AF tracking speed and prediction algorithms determine keeper rates for birds in flight. Native lenses typically deliver the best AF performance — third-party lenses may lose access to eye detection on some bodies.
What shutter speed do I need for birds in flight?
1/2000s is the starting point for most birds in flight. Fast-wing species (hummingbirds, warblers, swallows) need 1/3200s or faster to freeze wing motion completely. Larger soaring birds (raptors, pelicans) can be sharp at 1/1000s-1/1600s. For intentional motion blur in wings while keeping the body sharp, 1/250s-1/500s with panning technique produces dramatic results — but expect a low keeper rate until you develop the skill.
Our Top Recommendation
Based on our research, the Tamron 150-500mm (Sony) is our top pick — wildlife, birding, and aviation photography on sony.
Get Our Top 3 Picks
Get our top 3 picks for your budget — one email, then only updates.
Only when something changes. Unsubscribe anytime.