Lenses for Scenic and Outdoor Photography

The lens you mount determines the scenery you bring home.
A 14mm ultra-wide standing at the edge of a glacier makes the ice wall tower overhead while the valley stretches into infinite distance. A 35mm on the same tripod position compresses the same scene into a tighter, more intimate frame where the glacier becomes one element among many. Neither is wrong. But choosing the wrong focal length for the story you want to tell means fighting the optics instead of working with them — and that fight shows in the final image.
We have spent years comparing wide-angle lenses across focal lengths, mount systems, and price tiers. We have examined corner sharpness at every aperture from wide open to diffraction-limited. We have tested filter compatibility, flare resistance, and weather sealing in conditions ranging from coastal fog to desert dust. This guide distills that work into practical decisions: which focal lengths serve which outdoor styles, whether primes or zooms match your shooting habits, and how to extract the sharpest possible results from whatever glass you choose.

Ultra-Wide vs Standard Wide: Two Different Photographs
The 14-24mm ultra-wide range and the 24-35mm standard wide range produce fundamentally different scenic images. Understanding the visual difference before buying prevents the most common mistake in wide-angle lens selection: buying an ultra-wide when a standard wide would serve the composition better, or vice versa.
Ultra-wides between 14mm and 20mm exaggerate perspective. Foreground objects — a rock, a wildflower, a tide pool — appear large and dominant while background mountains shrink into the distance. This exaggeration creates a sense of depth and scale that pulls the viewer into the frame. The classic scenic composition with a strong foreground element leading the eye toward a distant peak relies on this perspective distortion. Without it, the foreground shrinks to insignificance and the image flattens.
Standard wide angles between 24mm and 35mm compress perspective slightly compared to ultra-wides. Foreground and background maintain a more natural size relationship. Mountains look taller relative to the valley floor. Layers of ridgelines stack more densely. The 24-35mm range is where scenic photography overlaps with environmental portraiture and architectural work — the field of view is wide enough to include context without the spatial distortion that makes ultra-wide images feel stretched at the edges.
A 16mm shot of a mountain lake places the shore rocks at center stage with the peaks as a backdrop. A 35mm shot of the same lake from the same position frames the mountain as the subject with the shore as a thin strip of context at the bottom. Both are valid compositions. The focal length determines which element dominates, and that choice should come from the story, not from the only lens in your bag.
Prime Sharpness Against Zoom Flexibility
Primes win the optical benchmarks.
A well-designed 14mm f/2.8 prime resolves more detail in the extreme corners at f/8 than a 14-24mm f/2.8 zoom at the same focal length and aperture. The difference is measurable on an MTF chart and visible in large prints. Fewer optical elements mean fewer air-to-glass surfaces where light scatters, less chromatic aberration to correct, and simpler coatings that reject flare more effectively. For scenic work where corner sharpness matters — and it always matters, because outdoor photo viewers inspect corners — the prime's optical advantage is real.
Zooms win everywhere else. A 16-35mm f/4 zoom replaces three primes (16mm, 24mm, 35mm) in a single barrel. On a ridgeline where your tripod position is fixed by terrain, the ability to fine-tune from 22mm to 28mm without moving means finding the exact composition rather than the approximate one. Weight savings from carrying one zoom instead of two primes offset the zoom's slightly heavier individual weight. And lens changes in dusty, windy, or wet conditions introduce contamination risk that a single zoom eliminates entirely.
The practical difference in corner sharpness between a modern zoom and a modern prime has narrowed over the past decade.
Current-generation wide zooms from Canon, Nikon, and Sony resolve enough detail at f/8 to produce clean 30x40-inch prints from 45+ megapixel sensors. The prime advantage remains, but it lives in a territory most photographers never reach: gallery-sized prints, extreme crops, and forensic pixel-peeping at 200% magnification. If your output is web, social media, or prints under 20 inches on the long side, a zoom sacrifices nothing you can see.
Filter Systems: Screw-On vs Square Holder
Filters separate outdoor scenic photography from nearly every other genre. Polarizers, neutral density filters, and graduated ND filters all perform optical corrections that software cannot fully replicate. The filter system you choose — screw-on or square holder — affects which filters you can stack, how quickly you can swap them, and how much your kit weighs.
Screw-on filters thread directly into the front of the lens.
They are compact, lightweight, protected by the lens cap when not in use, and impossible to accidentally knock off. A circular polarizer screwed onto a 77mm or 82mm filter thread adds almost no bulk to a lens bag. The limitation is inflexibility: each filter fits only lenses with matching thread diameter. A 77mm polarizer does not fit an 82mm lens without a step-up ring, and step-up rings introduce vignetting on ultra-wides. A photographer with three lenses of different filter diameters needs three sets of screw-on filters — or a collection of step-up rings that add fiddly adapter steps to every filter swap.
Square holder systems (100mm or 150mm) use an adapter ring on the lens and a holder bracket that accepts rectangular filter slides.
One set of square filters works across every lens in your bag — just swap the adapter ring. Graduated ND filters slide up and down in the holder to position the transition zone precisely on the horizon, which is impossible with a screw-on grad. The downsides are size, weight, and fragility. A 100mm filter holder with three glass filters adds 300-500g to your pack. The filters themselves are exposed glass sheets that scratch if stored loosely and shatter if dropped on rock.
Our recommendation depends on how many filters you use regularly. If you carry only a polarizer and occasionally an ND, screw-on filters are simpler and lighter. If you stack a polarizer with a grad ND and an ND for long-exposure sunset work, a square holder system pays for itself in speed and convenience. Ultra-wide lenses below 16mm often require specialized slim-profile filters or rear-mounted filter holders because front-mount systems vignette at extreme angles of view.
Hyperfocal Distance: Maximum Depth Without Diffraction
Hyperfocal distance is the focus point that maximizes depth of field for a given focal length and aperture. Focus at the hyperfocal distance, and everything from half that distance to infinity falls within acceptable sharpness. This technique eliminates the need to stop down to f/16 or f/22 to get front-to-back sharpness — and that matters, because stopping down too far costs you resolution.
At 16mm and f/8 on a full-frame sensor, the hyperfocal distance is approximately 1.1 meters. Focus at 1.1 meters, and everything from about 0.55 meters to infinity is acceptably sharp. You never need to go beyond f/11 at 16mm for deep scenic shots. At 35mm and f/8, the hyperfocal distance stretches to approximately 5.1 meters — which means foreground elements closer than 2.5 meters may fall outside the depth of field. Longer focal lengths push the hyperfocal distance further and make front-to-back sharpness harder to achieve without focus stacking.
Smartphone apps like PhotoPills and HyperFocal Pro calculate hyperfocal distance for any lens and aperture combination. Enter your focal length, aperture, and sensor size, and the app tells you exactly where to focus. In the field, use live view magnification to verify critical focus on a mid-ground element at the calculated distance. Autofocus can overshoot or lock onto the wrong plane in complex scenes — manual focus with magnified live view gives absolute control.
One subtlety: hyperfocal calculations assume a standard "circle of confusion" that defines acceptable sharpness. High-resolution sensors (45+ megapixels) resolve finer detail than the standard circle of confusion allows, which means the traditional hyperfocal distance may not deliver pixel-sharp results at the near edge. For critical work on high-res sensors, focus slightly beyond the calculated hyperfocal point or use focus stacking to guarantee sharpness at every depth.
Diffraction and Small Apertures: Where Sharpness Peaks and Falls
Every lens has an aperture sweet spot where sharpness peaks. For most scenery-grade wide-angle lenses, that sweet spot sits between f/5.6 and f/11. Below f/5.6, optical aberrations — field curvature, coma, astigmatism — soften the corners even if the center is sharp. Above f/11, diffraction begins to dominate.
Diffraction is a physics problem, not a lens quality problem. Light waves bending around the aperture blades spread slightly, creating an Airy disk that grows larger as the aperture shrinks. At f/8, the Airy disk on a full-frame sensor is smaller than most pixel pitches, so diffraction is invisible. At f/16, the disk approaches pixel size on a 45-megapixel sensor. At f/22, the disk exceeds pixel size and every pixel captures slightly smeared light — reducing effective resolution across the entire frame.
The practical impact depends on your sensor resolution and output size. On a 24-megapixel sensor, diffraction at f/16 is barely visible even in large prints. On a 61-megapixel sensor, the same f/16 shows measurable softening in a 100% crop. The higher your sensor resolution, the earlier diffraction becomes your sharpness bottleneck.
Shoot at f/8 when possible. Use f/11 when you need more depth of field. Reserve f/16 for situations where depth of field is physically impossible at wider apertures — extreme close foregrounds with distant backgrounds where hyperfocal focusing fails. Avoid f/22 on high-resolution sensors unless you are deliberately trading sharpness for a starburst effect on point light sources, which f/22 produces more effectively than any other aperture.
Focus Stacking for Front-to-Back Sharpness
When a single exposure cannot deliver sharpness from the nearest foreground element to the distant horizon — even at the hyperfocal distance — focus stacking solves the problem without diffraction penalties. The technique captures multiple frames at the same composition, each focused at a different depth, then merges the sharpest regions from each frame into a single image.
A typical scenic focus stack uses three to five frames. Frame one focuses on the nearest foreground element (a rock, a flower, a stream bank). Frame two focuses at mid-ground (a tree line, a path). Frame three focuses at infinity (mountains, sky, distant structures). Each frame is shot at f/8 for peak optical sharpness. The merge — performed in Photoshop, Helicon Focus, or Zerene Stacker — blends the in-focus zones into a single sharp composite.
Focus stacking requires a tripod and a static scene. Wind-blown grasses, flowing water, and moving clouds change between frames, creating ghosting artifacts at the blend boundaries. Shoot on calm mornings or wait for gaps between gusts. Use manual focus with small increments between frames — autofocus may not distribute the focus points evenly through the scene depth.
The payoff is substantial. A three-frame stack at f/8 produces an image with corner-to-corner sharpness at every depth — a result no single exposure at any aperture can match. For high-resolution sensors above 40 megapixels, focus stacking at f/8 outperforms single-shot capture at f/16 by a visible margin in both sharpness and detail retention.
Panoramic Stitching: More Resolution, Different Perspective
Panoramic stitching captures multiple overlapping frames across a scene and merges them into a single wide image. The result is both wider field of view and higher total resolution — a three-frame pano from a 45-megapixel sensor produces roughly 100+ megapixels of image data after alignment and crop. For large prints, stitching at 35mm or 50mm produces cleaner detail than a single ultra-wide shot, because the longer focal length avoids the corner softness and distortion inherent to ultra-wides.
The technique works best with normal to short telephoto focal lengths. A 50mm lens stitched across five frames produces a panoramic view equivalent to roughly 20mm — but with the resolution and per-pixel sharpness of 50mm optics. This approach has become the preferred method among fine-art scenic photographers who print at 40 inches and above, where the resolution advantage is immediately visible.
A nodal slide — a rail that lets the camera rotate around the lens's no-parallax point rather than the tripod's center — prevents parallax errors between frames. For distant scenes without close foreground elements, parallax is negligible and you can pan freely on a ball head. For scenes with foreground elements closer than 3 meters, parallax causes misalignment at the overlap zones and a nodal slide becomes necessary.
Overlap each frame by 30-40%. Less overlap gives the stitching software insufficient data to align; more overlap wastes frames without improving the result. Shoot in manual exposure mode with locked white balance so brightness and color temperature remain consistent across the sequence. A single pano sequence should complete within 10-15 seconds to minimize changes in cloud shadows and light direction.
Tripods, Mirror Lockup, and Vibration Control
A tripod is not optional for scenic photography at the highest quality level. Handheld shooting at f/8 and 1/250s produces acceptable results. But the conditions that define great outdoor light — dawn, dusk, blue hour, overcast skies — demand shutter speeds of 1/30s to multiple seconds. No amount of image stabilization substitutes for a solid three-legged platform at those speeds.
Carbon fiber tripods weigh 30-40% less than aluminum equivalents at the same load capacity. For a photographer hiking 10 km to a dawn location, that weight difference accumulates over hours of carrying. A carbon tripod rated for 10 kg of payload handles any mirrorless body with any lens and provides vibration damping that aluminum cannot match — carbon fiber absorbs vibrations faster, reducing settling time after positioning.
Mirror lockup matters only for DSLR shooters. The mirror slap when a DSLR takes a photo creates a vibration impulse at shutter speeds between 1/15s and 1/2s — the exact range where outdoor photographers work at twilight. Locking the mirror up before the exposure eliminates this vibration source. Mirrorless cameras have no mirror and therefore no mirror slap, which is one reason mirrorless systems have become dominant in outdoor scenic work.
Use a remote shutter release or a 2-second timer to avoid touching the camera during exposure. Even pressing the shutter button on a tripod-mounted camera introduces vibration that takes 1-2 seconds to decay. Electronic front curtain shutter (EFCS) mode, available on most modern cameras, eliminates shutter-induced vibration at the start of exposure. Combine EFCS with a timer or remote, and the only vibration source left is wind acting on the tripod and camera.
Distortion Correction: In-Camera and In Post
Every ultra-wide lens produces barrel distortion. Straight lines near the frame edges bow outward, and the effect intensifies at shorter focal lengths. A 14mm prime exhibits more distortion than a 24mm, and a 10mm fisheye more than either. This distortion is optical physics — wider angles of view require more aggressive refraction at the lens edges, and that refraction curves the image plane.
Modern mirrorless systems apply distortion correction automatically to JPEGs and embed correction profiles in raw files. Lightroom, Capture One, and DxO PhotoLab read these profiles and apply geometric corrections when you import. The correction is so integrated into the imaging pipeline that some lenses are designed with intentional distortion — the engineers know software will fix it, so they optimize other parameters like sharpness and weight instead.
The correction process slightly crops the image (straightening bowed edges pulls corner content outside the frame) and can introduce minor softening at the extreme edges where pixel interpolation stretches the corrected image. For most scenic work, this softening is invisible. For architectural shots where straight lines are critical — bridges, buildings, piers — verify correction accuracy by zooming to 100% on key structural lines and adjusting manually if the automatic profile over- or under-corrects.
Perspective correction is a separate issue. Tilting an ultra-wide upward at a cliff face causes converging verticals — the cliff walls lean inward toward the top of the frame. Software perspective tools in Lightroom (Transform panel) and Photoshop (Adaptive Wide Angle filter) correct converging lines, but at the cost of aggressive cropping. Keeping the camera level and correcting composition through foreground placement avoids convergence entirely and preserves more of the captured frame.
Golden Hour, Blue Hour, and Harsh Midday: Adapting Your Lens Choice
The color temperature and angle of light change the demands on your lens throughout the day.
Golden hour — the period from sunrise to roughly 30 minutes after, and from 30 minutes before sunset to sundown — produces warm, directional light at a low angle. This light rakes across textures, casts long shadows, and creates contrast between sunlit and shaded areas. A wide-angle lens at golden hour captures both the warm foreground and the cool shadowed areas in a single frame, demanding high dynamic range from the sensor and low flare from the lens.
Flare resistance matters most during golden hour because the sun sits near or within the frame. Multi-coated elements, recessed front elements, and deep lens hoods reduce ghosting and veiling flare. Prime lenses with fewer elements generally handle direct sunlight better than complex zooms with 15-20 elements. If your zoom produces unacceptable flare with the sun in frame, shade the front element with your hand or a flag positioned just outside the composition.
Blue hour — the 20-30 minutes before sunrise and after sunset when the sky turns deep blue — produces soft, shadowless light with extremely high color saturation. Exposures stretch to 1-15 seconds at f/8 and base ISO. A tripod is mandatory. The low-contrast light at blue hour is forgiving on lens quality — corner softness and chromatic aberration become less visible when there are no high-contrast edges to reveal them.
Midday sun creates harsh, overhead light that most scenic shooters avoid. But strong sunlight is the only condition that produces deep polarization effects. A circular polarizer at 90 degrees to the sun direction darkens blue skies, removes surface glare from water and foliage, and increases color saturation by 20-30%. On ultra-wide lenses, polarizer effects become uneven — the sky darkens more at the edges than the center, creating an obvious gradient. Use polarizers carefully at focal lengths below 24mm and check the live view before committing to the exposure.
Weather, Moisture, and Protecting Your Glass
Outdoor scenic photography happens in conditions that indoor photographers never encounter. Rain, salt spray, blowing sand, freezing temperatures, and rapid humidity changes all stress lens optics and mechanics. Preparation determines whether gear survives a shoot or returns to the shop for repair.
Rain covers — transparent plastic sleeves with drawstring openings — keep water off the lens barrel and camera body during light to moderate rain. They cost almost nothing, weigh nothing, and fit in any pocket. A microfiber cloth for the front element is the other essential: water droplets on glass create soft spots in the image, and a quick wipe between exposures keeps the element clear. Carry two cloths. One will be wet within an hour of coastal shooting.
Cold weather introduces battery drain and condensation risk. Lithium-ion batteries lose capacity below freezing — keep spares in an inner jacket pocket against your body heat. When you bring cold gear into a warm car or lodge, condensation forms instantly on every glass surface and can penetrate into the lens barrel. Place your entire kit in a sealed plastic bag before entering the warm environment. The condensation forms on the outside of the bag instead of on the glass, and the gear warms slowly without moisture reaching the optics.
Sand is the worst enemy of zoom mechanisms. Fine beach or desert sand infiltrates zoom barrels through the extending gaps between inner and outer tubes. Once inside, the grit scores lens elements and jams focus mechanisms. On windy sand days, either use a prime lens (no extending barrel) or wrap the zoom ring area with gaffer tape or a neoprene sleeve. Point the lens downward during mounting and dismounting to let gravity pull particles away from the barrel opening.
Weather-sealed lenses with rubber gaskets at the mount, rings, and switch panel resist moisture and fine particulate ingress. Sealing does not make a lens waterproof — prolonged exposure to driving rain or submersion will defeat any seal — but it buys time and tolerance for typical outdoor shooting conditions. Pair a sealed lens with a sealed camera body, and your system handles everything short of a thunderstorm without protective covers.
Building a Scenic Kit: Practical Combinations
The right outdoor kit depends on your primary subject, your willingness to carry weight, and whether you prioritize range or optical quality.
Minimalist kit (one lens): A 16-35mm f/4 zoom covers the core scenic range with room to compose tighter or wider without changing glass. This single lens handles everything from sweeping mountain panoramas at 16mm to isolated peak compositions at 35mm. Pair with a 77mm or 82mm circular polarizer and a 6-stop ND filter. Total glass weight: 400-600g depending on mount system.
Two-lens kit: A 14-24mm f/2.8 zoom for ultra-wide expanses and starscapes, plus a 24-70mm f/2.8 for standard wide to normal perspectives. This combination covers 14mm to 70mm without gaps and provides f/2.8 across the range for astrophotography and low-light work. The weight penalty is real — roughly 1.2-1.8 kg for the pair — but the optical and aperture flexibility justifies it for dedicated scenic outings.
Prime-focused kit: A 14mm f/2.8 for ultra-wide, a 24mm f/1.4 for standard wide, and a 50mm f/1.8 for compressed scenes and stitched panoramas. Three primes weigh less than two pro zooms and deliver superior corner sharpness at every focal length. The limitation is no focal lengths between the primes — you compose by moving, not by zooming. Best suited to photographers who work slowly from a tripod and pre-visualize their compositions.
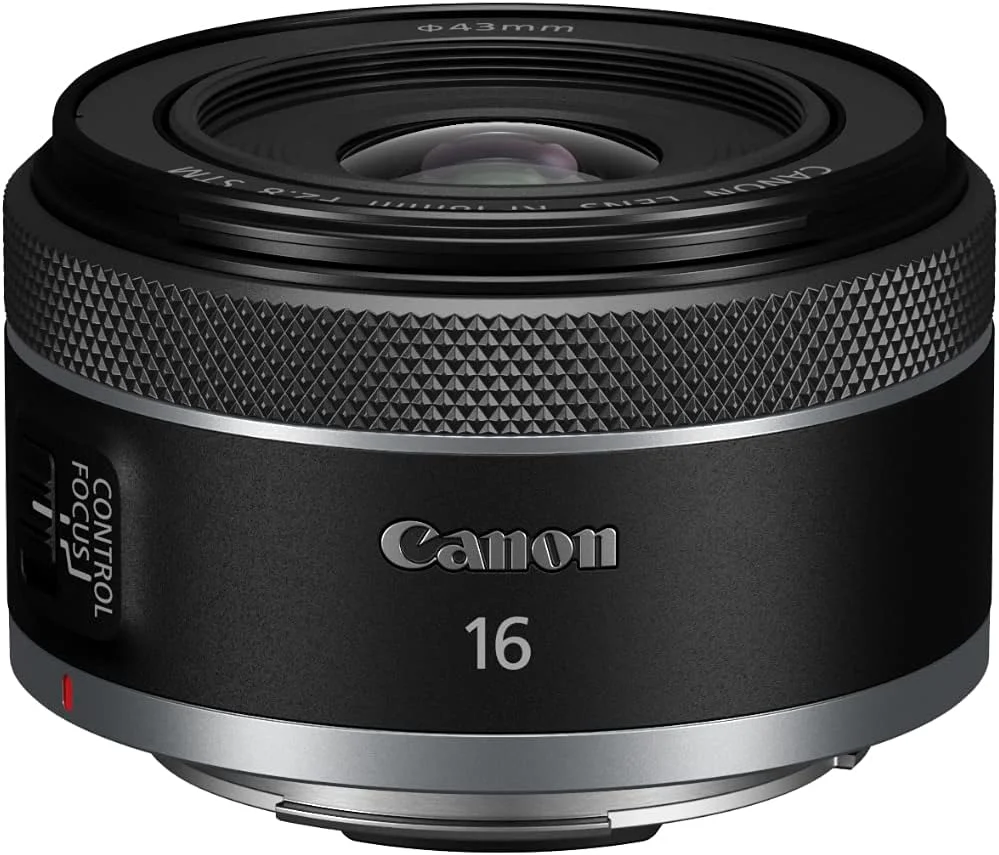
Ultralight hiking kit: A single pancake wide-angle — the Canon RF 16mm f/2.8 weighs just 165g and delivers excellent sharpness stopped down to f/8. Add a lightweight travel tripod and a polarizer. Total kit weight with body: under 1 kg. The fixed ultra-wide focal length forces strong foreground compositions and rewards photographers who approach scenes with intention rather than convenience. For multi-day backcountry trips where every gram matters, this combination is hard to beat. Canon APS-C shooters (R7, R10) can go even wider with the RF-S 10-18mm f/4.5-6.3 IS STM, which covers 16-29mm equivalent at just 150g and adds built-in stabilization.
Why the Canon RF 16mm f/2.8 Earns Our Top Pick
The Canon RF 16mm f/2.8 STM is the lens we recommend as a starting point for scenic shooters entering the wide-angle world. At 165g, it weighs less than most smartphone cases. The f/2.8 aperture is fast enough for astrophotography — Milky Way shots at 20-second exposures show clean, coma-free stars across most of the frame. Stopped down to f/8 for daylight scenery, corner sharpness rivals primes costing three times as much.
The 16mm focal length sits in a sweet spot between ultra-wide exaggeration and standard-wide restraint. It is wide enough to include dramatic foregrounds and expansive skies without the perspective distortion that makes 14mm images feel stretched. It is narrow enough that compositions do not require a strong foreground element to avoid empty center frames — a problem that plagues 12mm and 14mm focal lengths.
Budget-friendly pricing keeps the barrier to entry low. Scenic photography demands spending on glass, but this lens proves that spending more does not always mean getting more. The compact size means it fits in a jacket pocket alongside your camera body, eliminating the need for a dedicated lens pouch. For photographers who already own a standard zoom and want to add a wide-angle option, this pancake prime is the most efficient path.
Wide-Angle Lens Questions, Answered
These questions come up repeatedly among photographers building or expanding a scenic photography kit. For broader lens selection guidance, our lens buying framework covers decision criteria across all shooting genres.
What focal length is best for scenic outdoor photography?
Most scenic shooters reach for 14-24mm as their primary range. Ultra-wide angles between 14mm and 20mm capture sweeping vistas with strong foreground-to-background depth. A 24-35mm range works better for compressed mountain scenes, layered ridgelines, and isolating specific features within a broader view. Start with a 16-35mm zoom if you want one lens that covers both approaches, then add a dedicated ultra-wide prime once you know which end of that range you favor.
Should I use a prime or zoom for scenic shooting?
A zoom gives you compositional flexibility without changing position — useful on cliff edges, riverbanks, and anywhere your feet cannot move freely. A prime delivers sharper corner-to-corner performance at the same aperture, weighs less, and often handles flare better due to simpler optical designs. If you shoot from a tripod at a single location for extended periods (dawn sessions, long exposures), a prime rewards patience with image quality. If you hike fast and compose on the move, a zoom saves time and missed shots.
Do I need a full-frame camera for scenic photography?
Full-frame sensors collect more light per pixel, which translates to cleaner shadow recovery and wider dynamic range — both matter when pulling detail from deep shadows in high-contrast sunrise shots. A crop sensor with a good lens still produces excellent scenic images, especially in even lighting. The practical advantage of full frame shows up most in large prints above 24x36 inches and in extreme post-processing where you push exposure by 3+ stops. For web output and standard prints, crop-sensor results are difficult to distinguish from full frame.
What aperture produces the sharpest outdoor photos?
f/8 to f/11 is the sweet spot for most wide-angle lenses. At these apertures, optical performance peaks — center sharpness is at maximum and corner softness drops to its minimum. Stopping down further to f/16 or f/22 introduces diffraction, where light bending around the aperture blades softens the entire image. The sharpness loss from diffraction at f/22 on a 45-megapixel sensor is visible at 100% crop. Use f/16 only when you need the extra depth of field and cannot achieve it through hyperfocal focusing or focus stacking.
What filters do outdoor photographers actually need?
A circular polarizer is the single most useful filter — it cuts glare from water and wet rocks, deepens sky contrast, and saturates foliage colors in ways that cannot be replicated in post-processing. A 6-stop or 10-stop ND filter enables long exposures for smooth water and streaked clouds in daylight. Graduated ND filters balance bright skies against darker foregrounds, though modern sensors with 14+ stops of dynamic range have reduced their necessity. Start with a polarizer, add an ND when you want motion blur effects, and skip grad NDs unless your scenes regularly exceed your sensor’s dynamic range.
Is image stabilization important for wide-angle lenses?
On a tripod, image stabilization should be turned off — the stabilization motor can introduce micro-vibrations that soften long exposures. Handheld, stabilization extends your usable shutter speed by 3-5 stops depending on the system, which matters for golden hour shooting without a tripod or when hiking light. If you always shoot scenery from a tripod, stabilization adds cost and weight without benefit. If you mix handheld and tripod work, a stabilized lens gives you flexibility to ditch the tripod on steep trails.
How do I avoid distortion with ultra-wide lenses?
Barrel distortion — where straight lines bow outward near the frame edges — is inherent to ultra-wide optical designs. Modern lenses rely on software correction profiles built into Lightroom, Capture One, and in-camera JPEG processing to straighten these lines automatically. Keep the camera level to avoid converging verticals, which ultra-wides exaggerate more than any other focal length. Tilt the lens up at a building and the walls lean inward aggressively. A bubble level on your hot shoe or the electronic level in your viewfinder keeps the horizon true and walls vertical.
Our Top Recommendation
Based on our research, the Canon RF 16mm f/2.8 is our top pick — travel, vlogging, and real estate photography.
Get Our Top 3 Picks
Get our top 3 picks for your budget — one email, then only updates.
Only when something changes. Unsubscribe anytime.